On September 16th, Apple have released macOS Sequoia 15.0, so I’ve decided to write down several articles how to configure it for development purposes from zero to development-ready state. I work with Ruby on Rails, JavaScript tooling, Flutter, React Native and some other tools, so my config will contain tools, required for my work, so if you’d like to use your own toolbox - just change to your own tools.
#Table of contents
#System settings
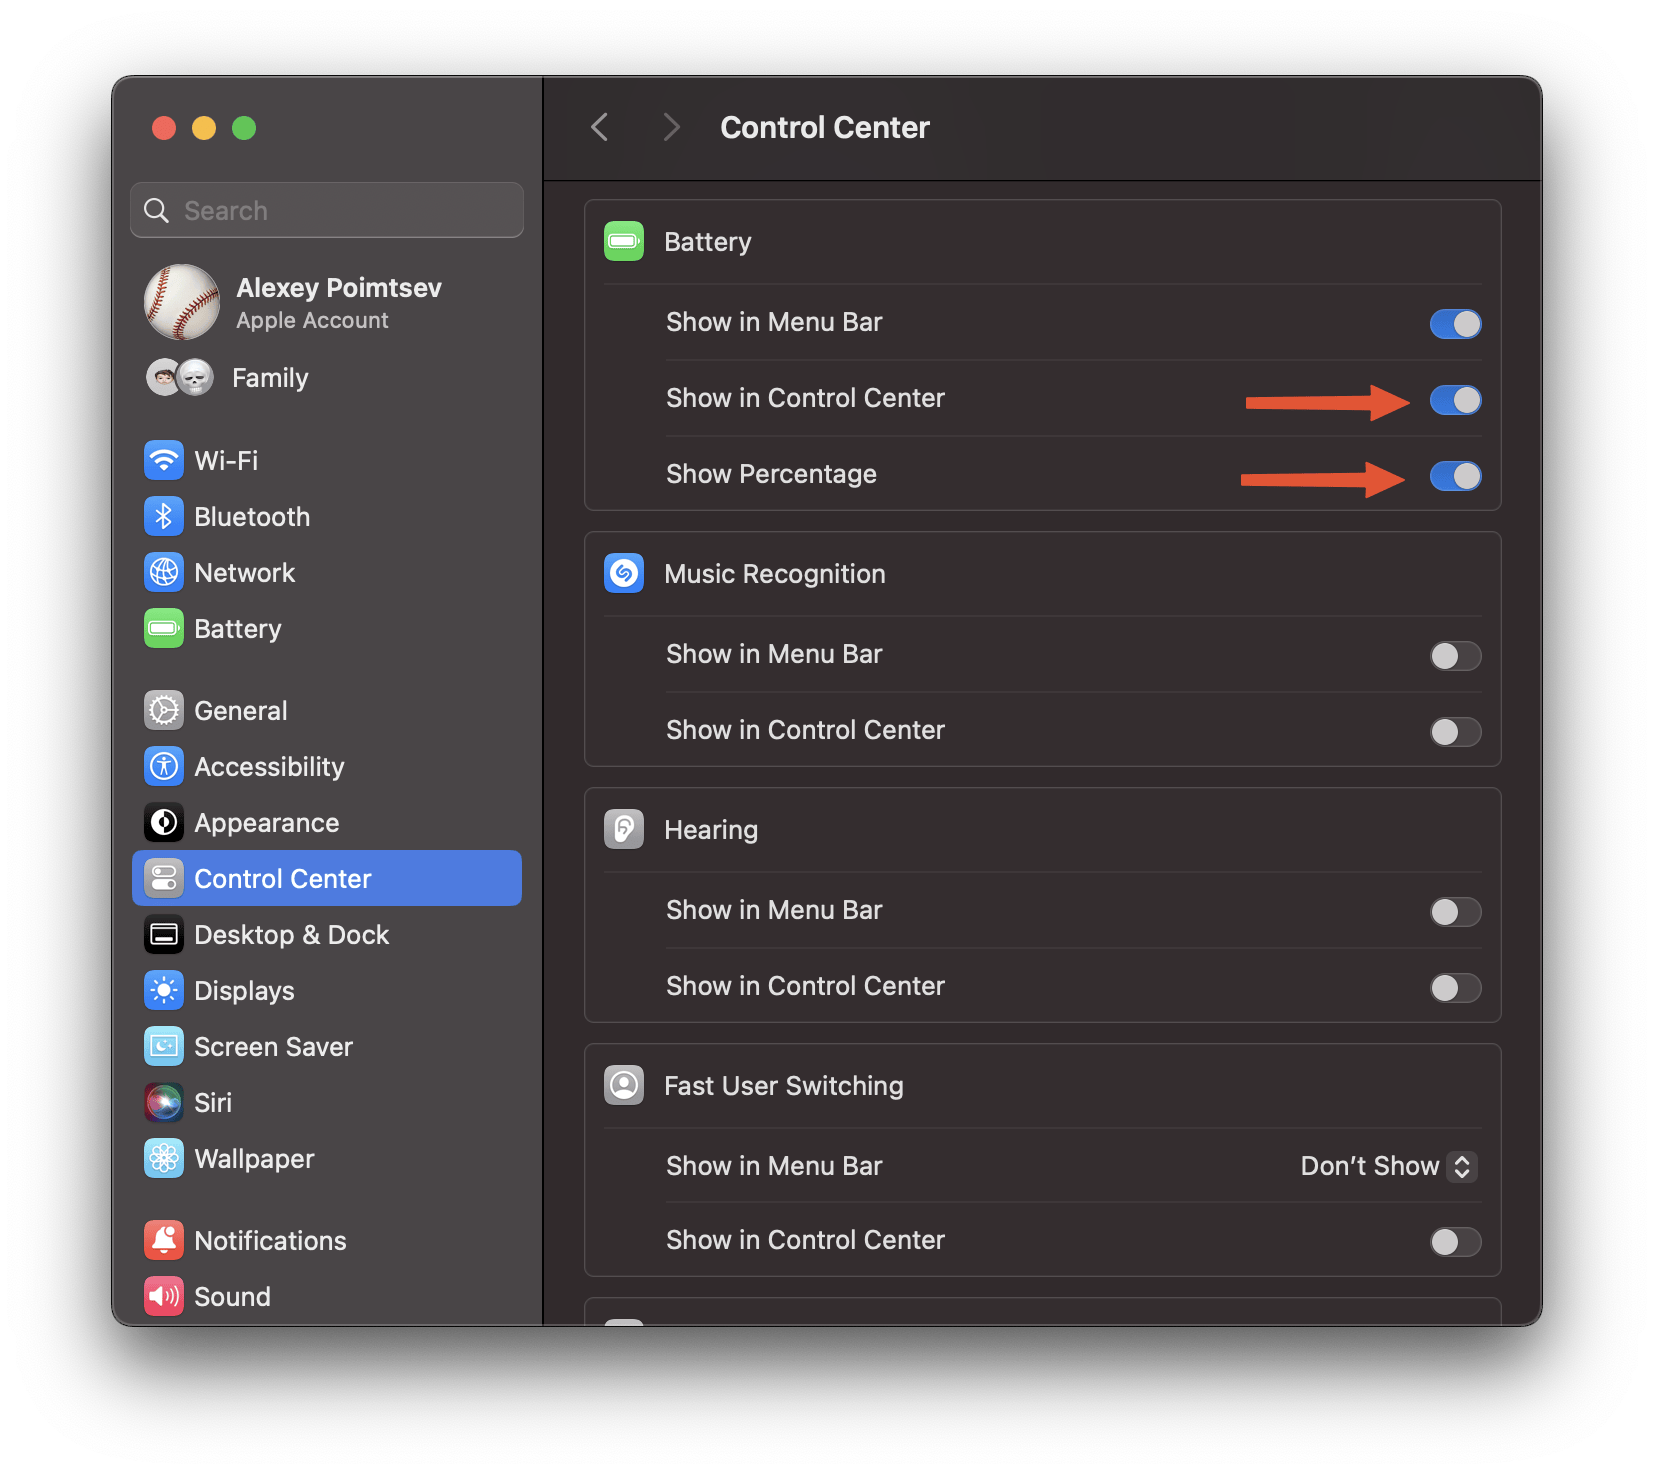
We will start with Control Center. Firstly, let’s enable battery status widget and set “display percentage” to on. I do recommend to disable all items from menubar, except
- Focus (Show when active)
- Screen mirroring (Show when active)
- Battery (Always visible)
It is useful, especially if you use a MacBook with notch.
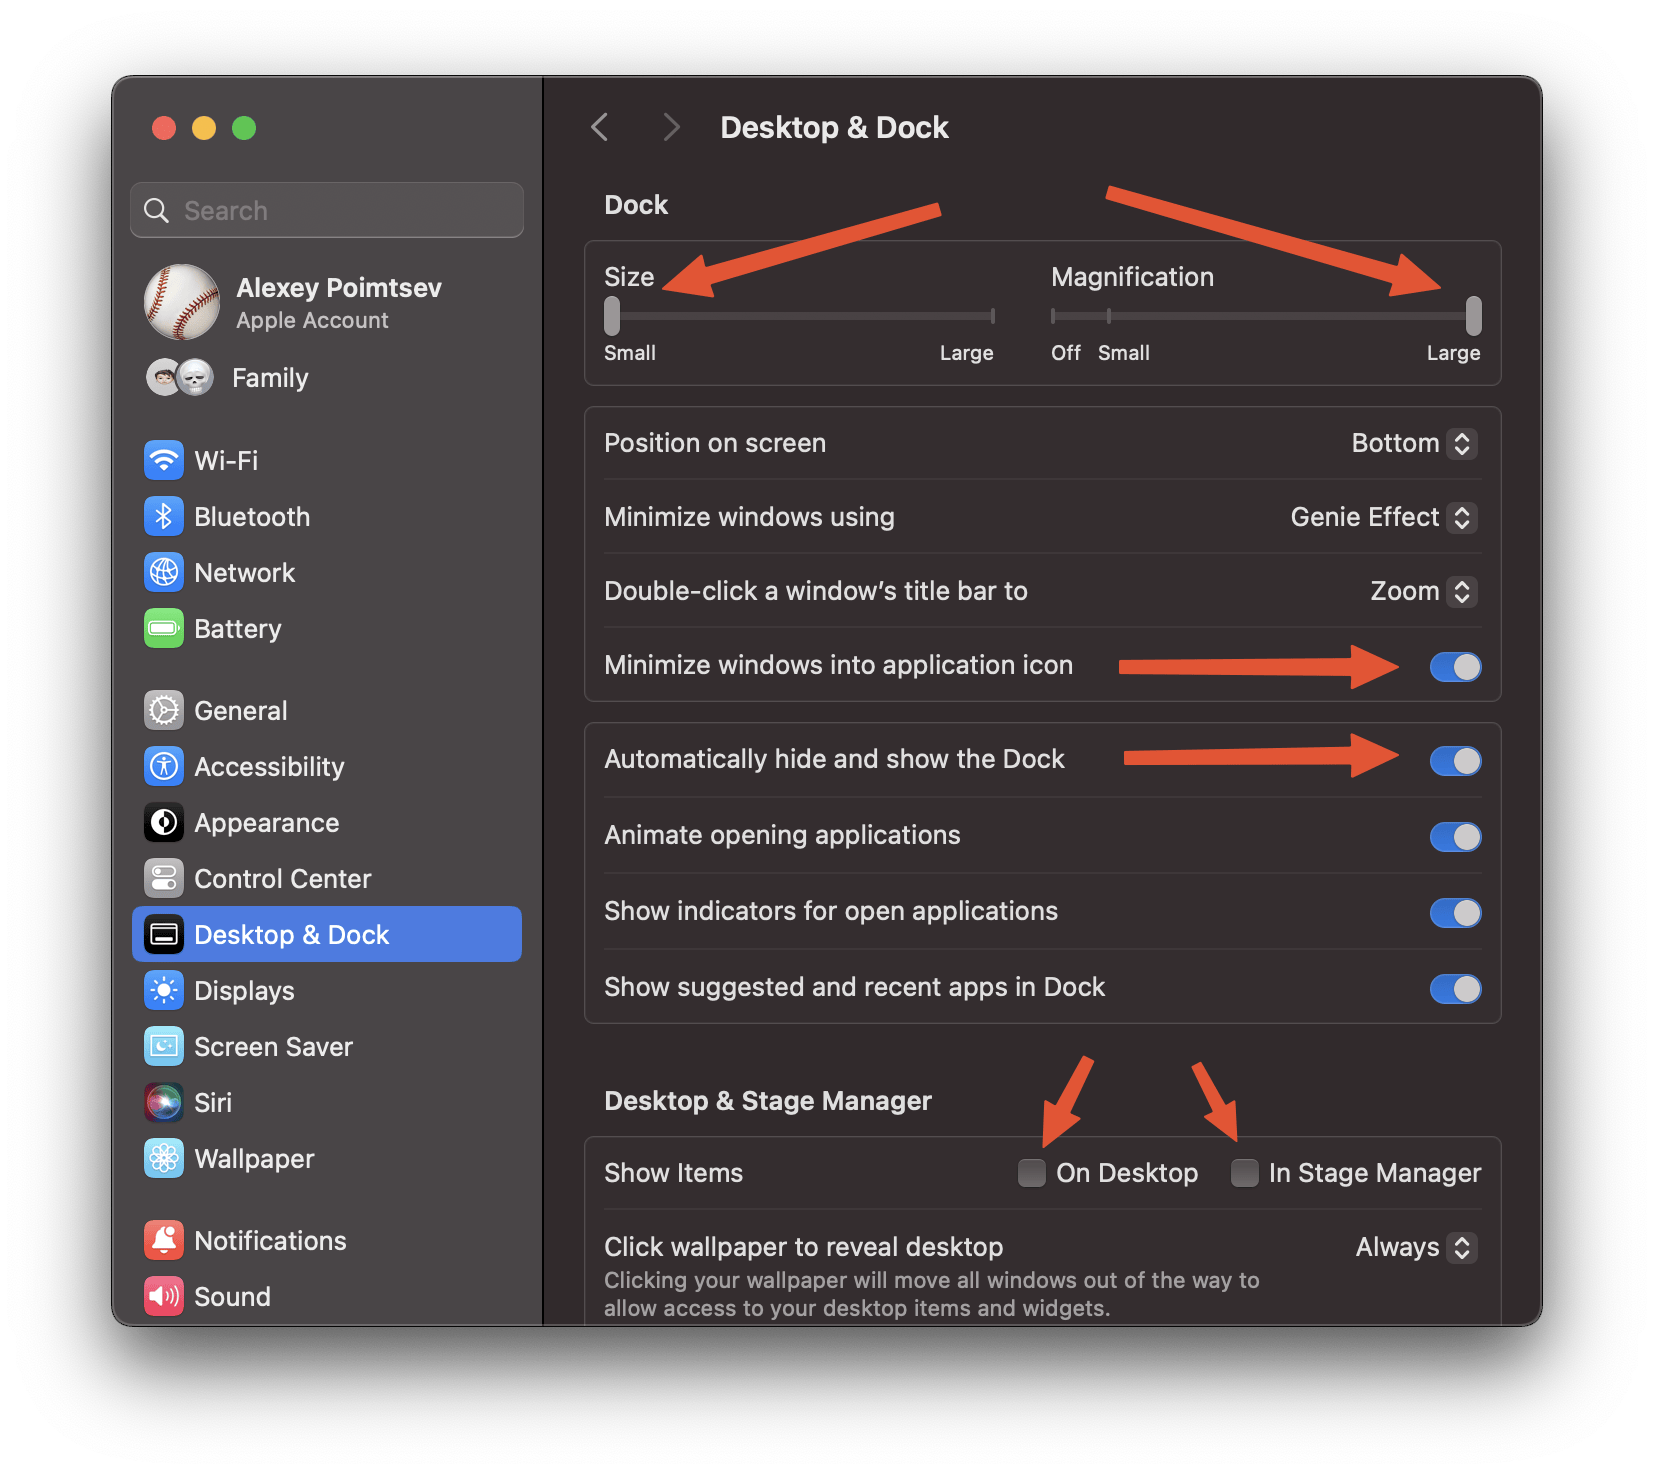
Next option we need to change - desktop and dock preferences. We’ve set dock small as possible, enabled magnification on hover and auto-hide. Also, applications will minimize to the application icon, but not to create extra icons in dock on minimize. To keep desktop looks clean - we’ve unchecked check-boxes “Show items on desktop and stage manager”.
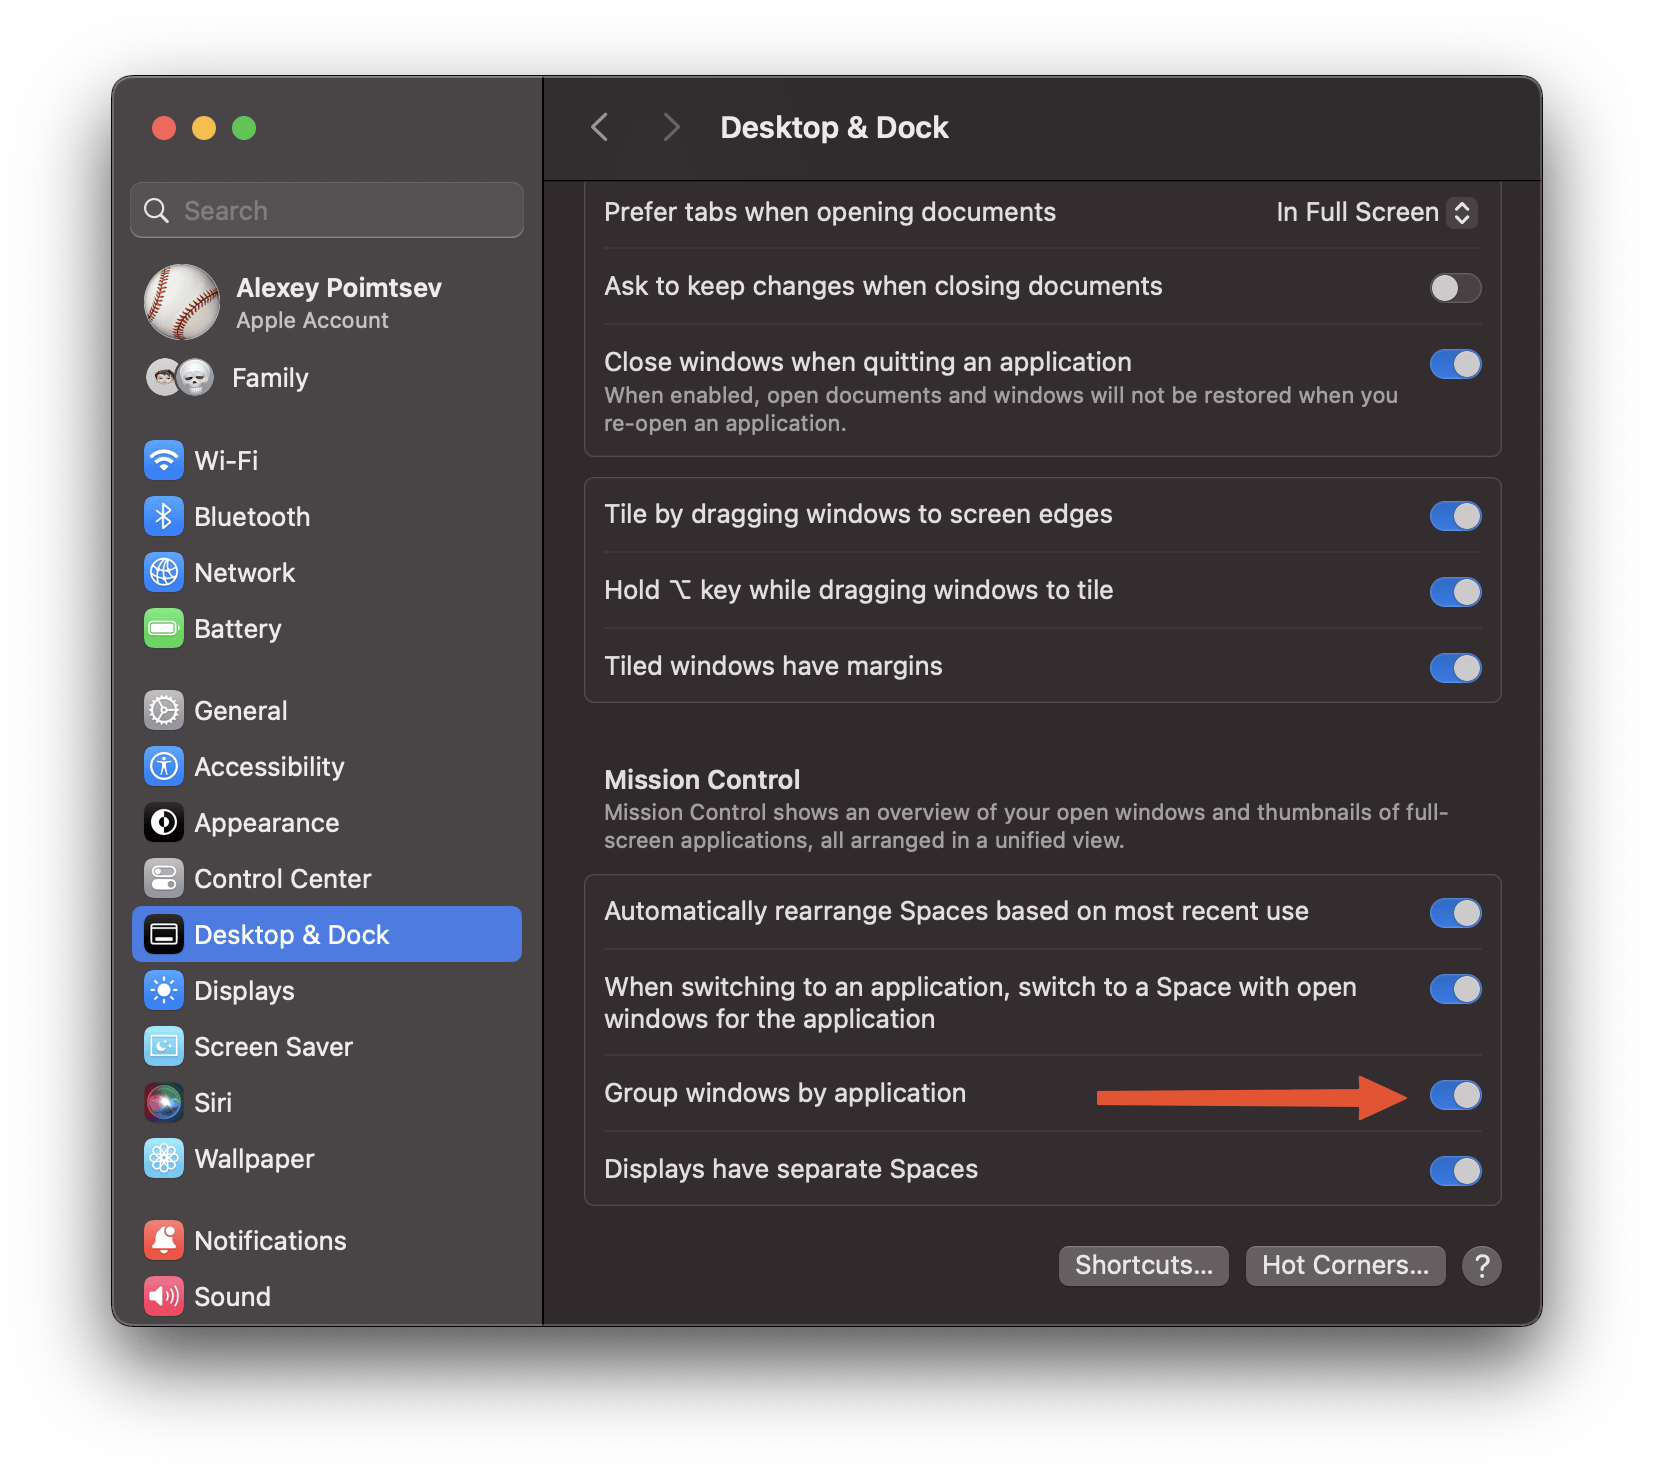
To group application windows in mission control, you can check the following switch.
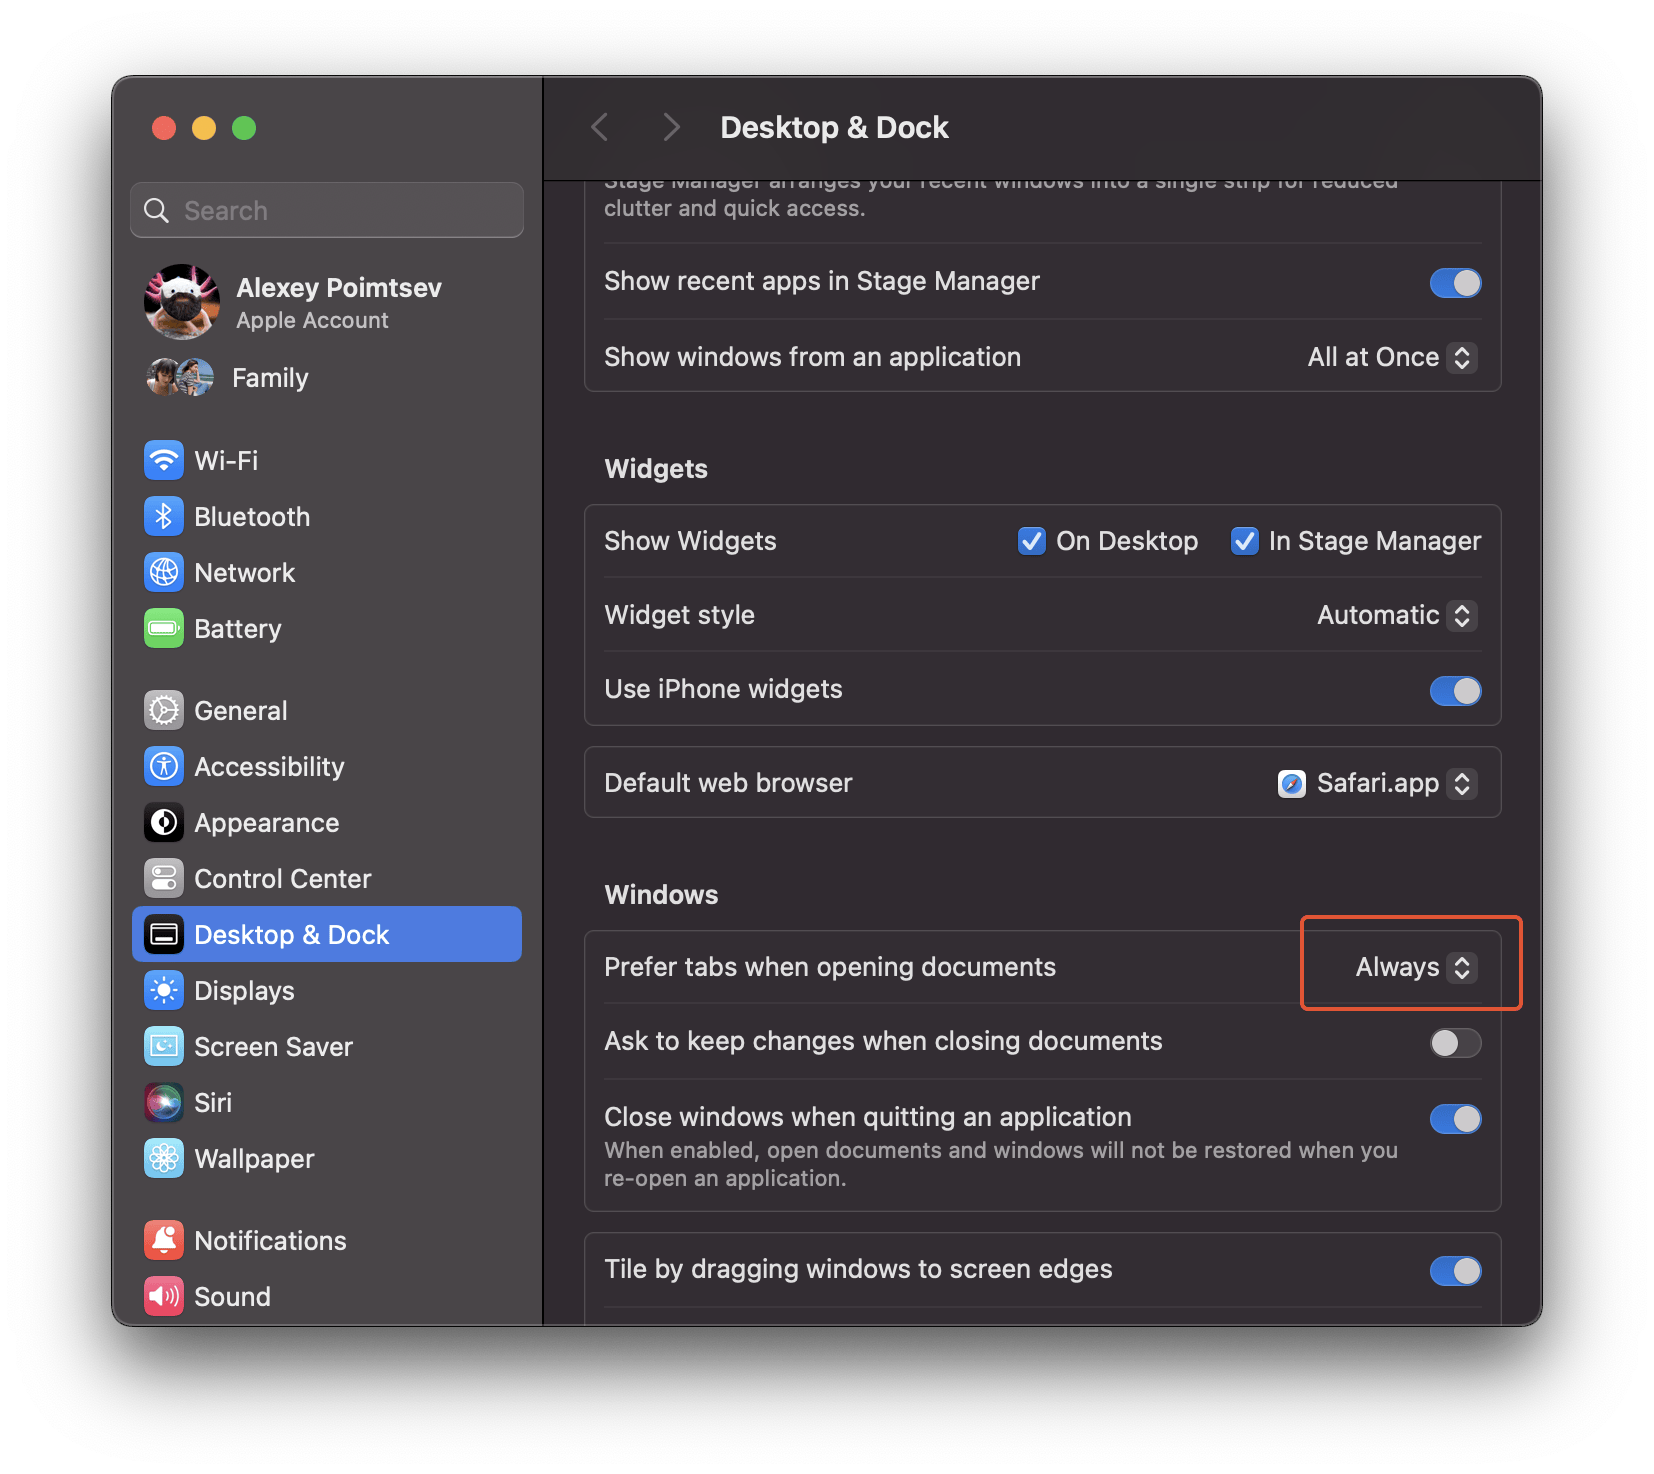
Another useful option is preferring to open new tabs instead of new windows.
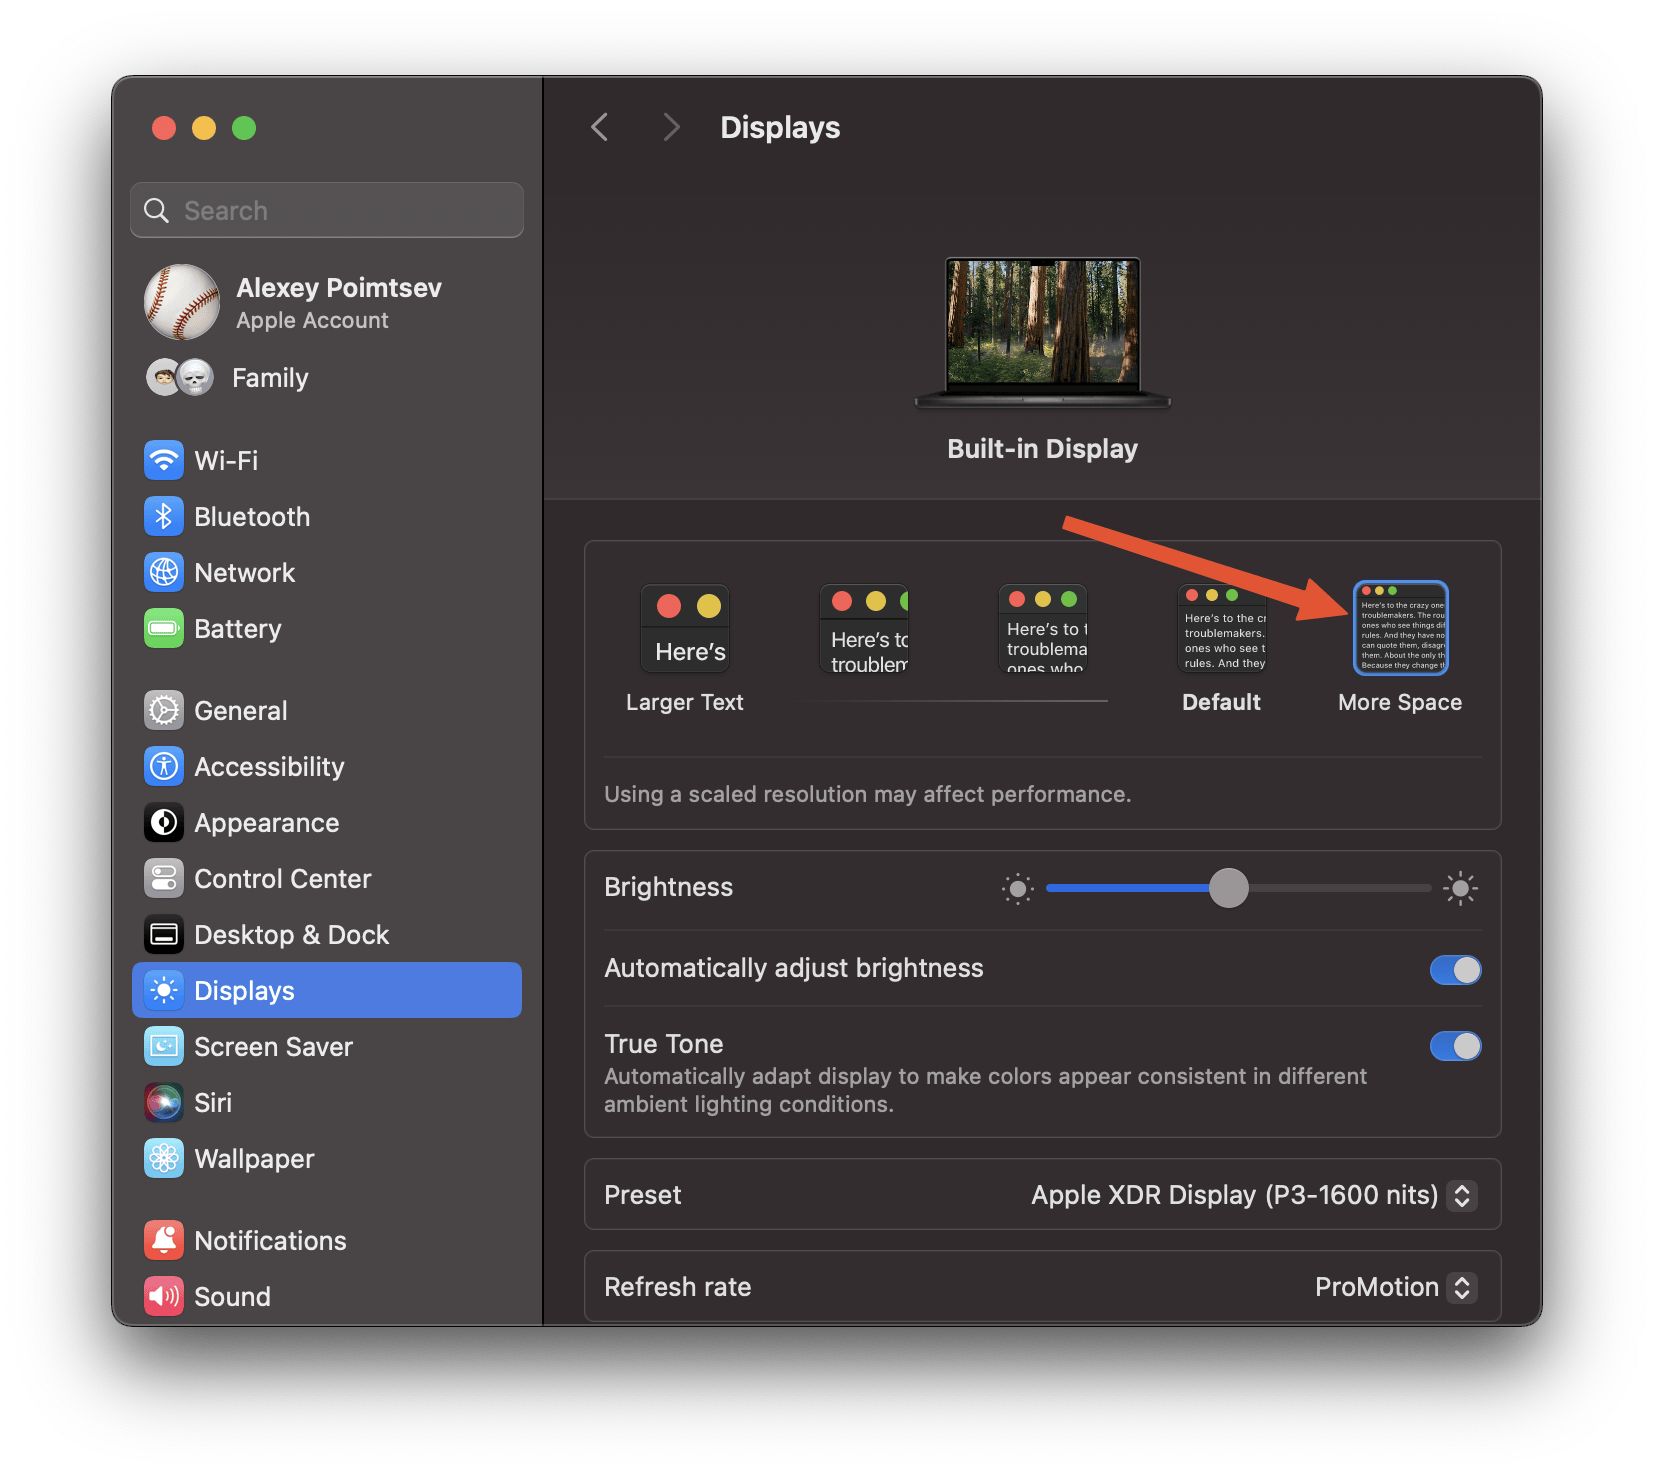
You may need to change resolution, especially if you use a device with a large screen.
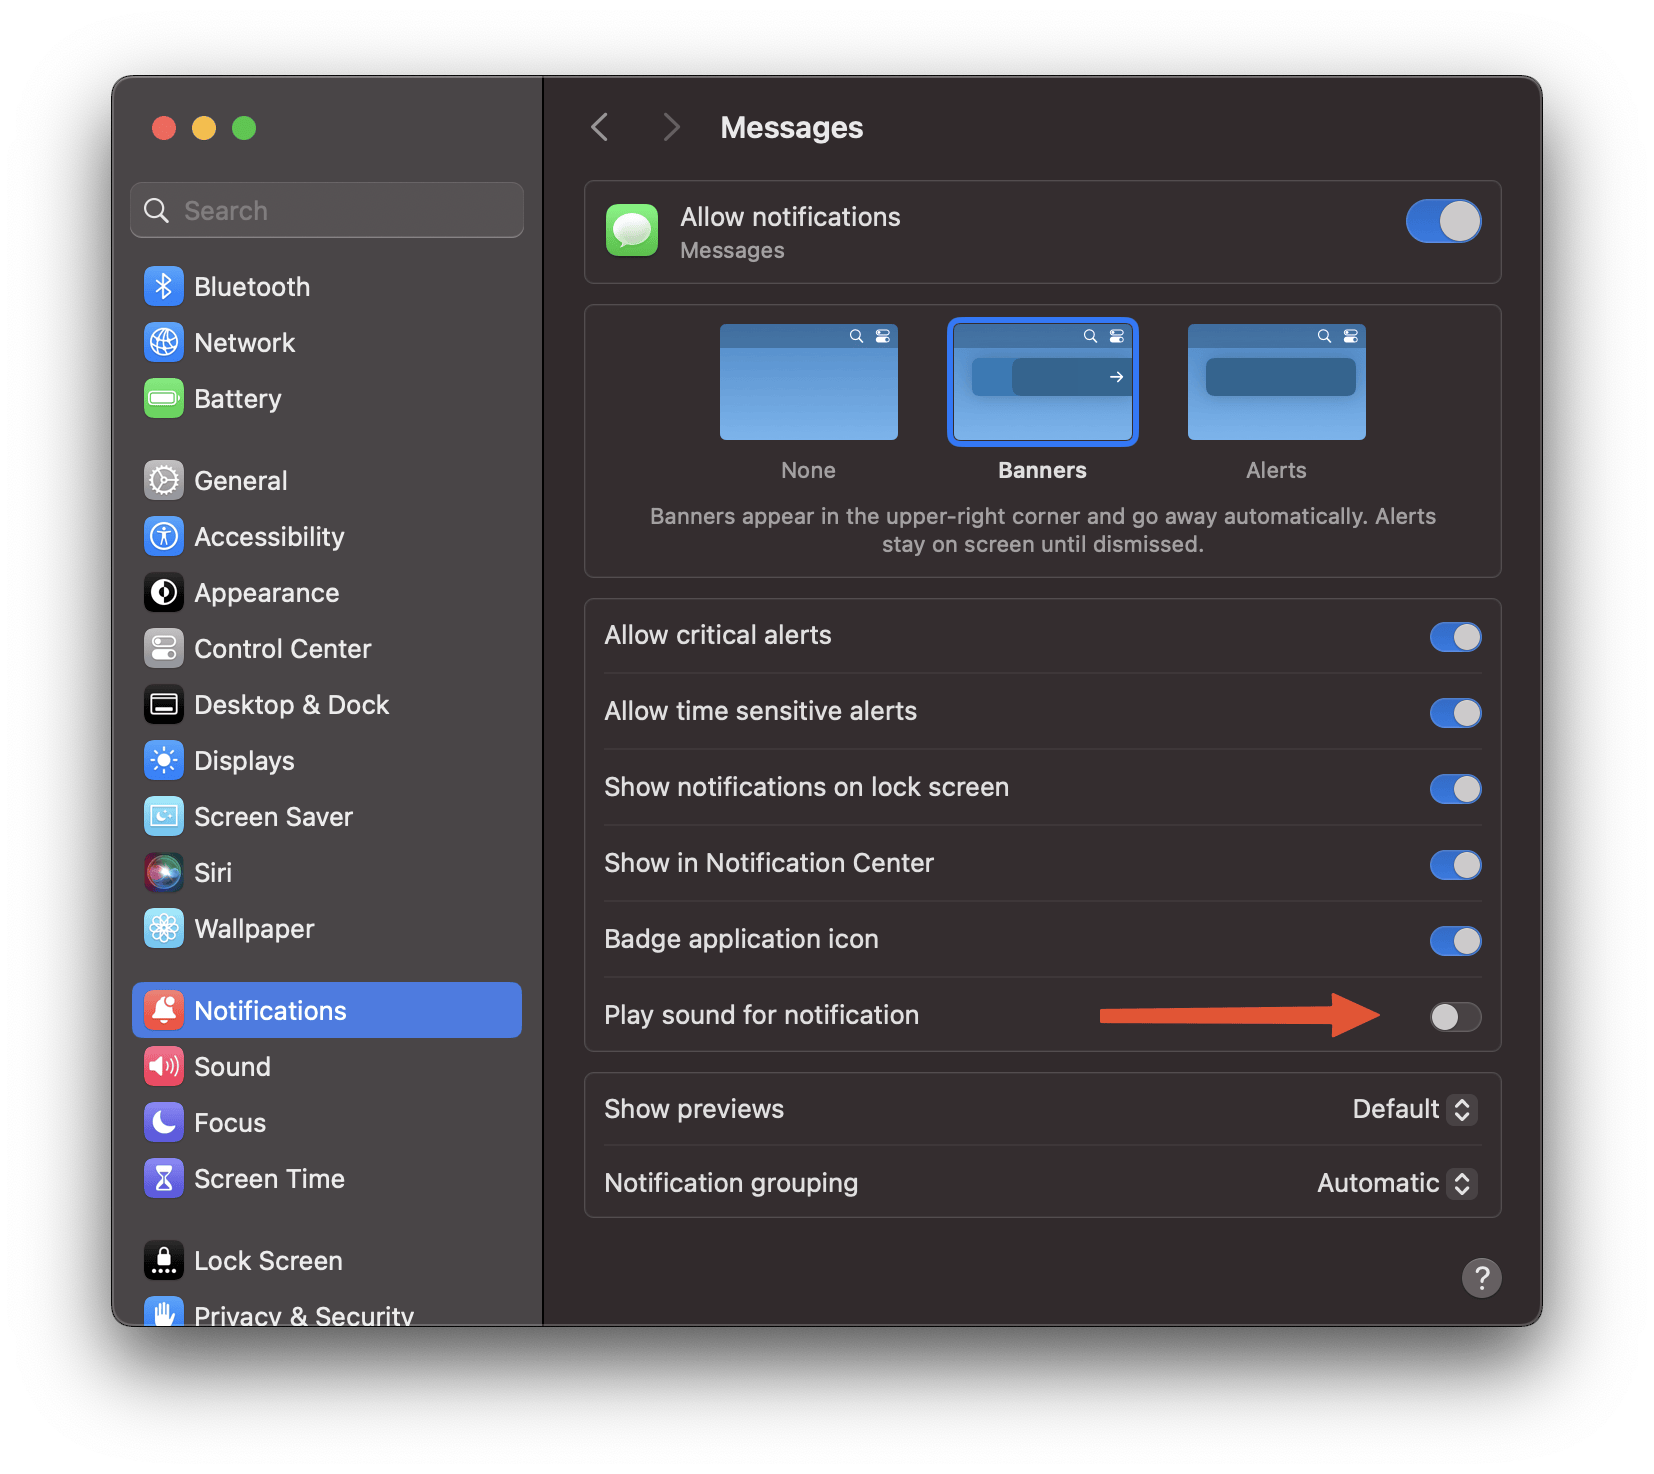
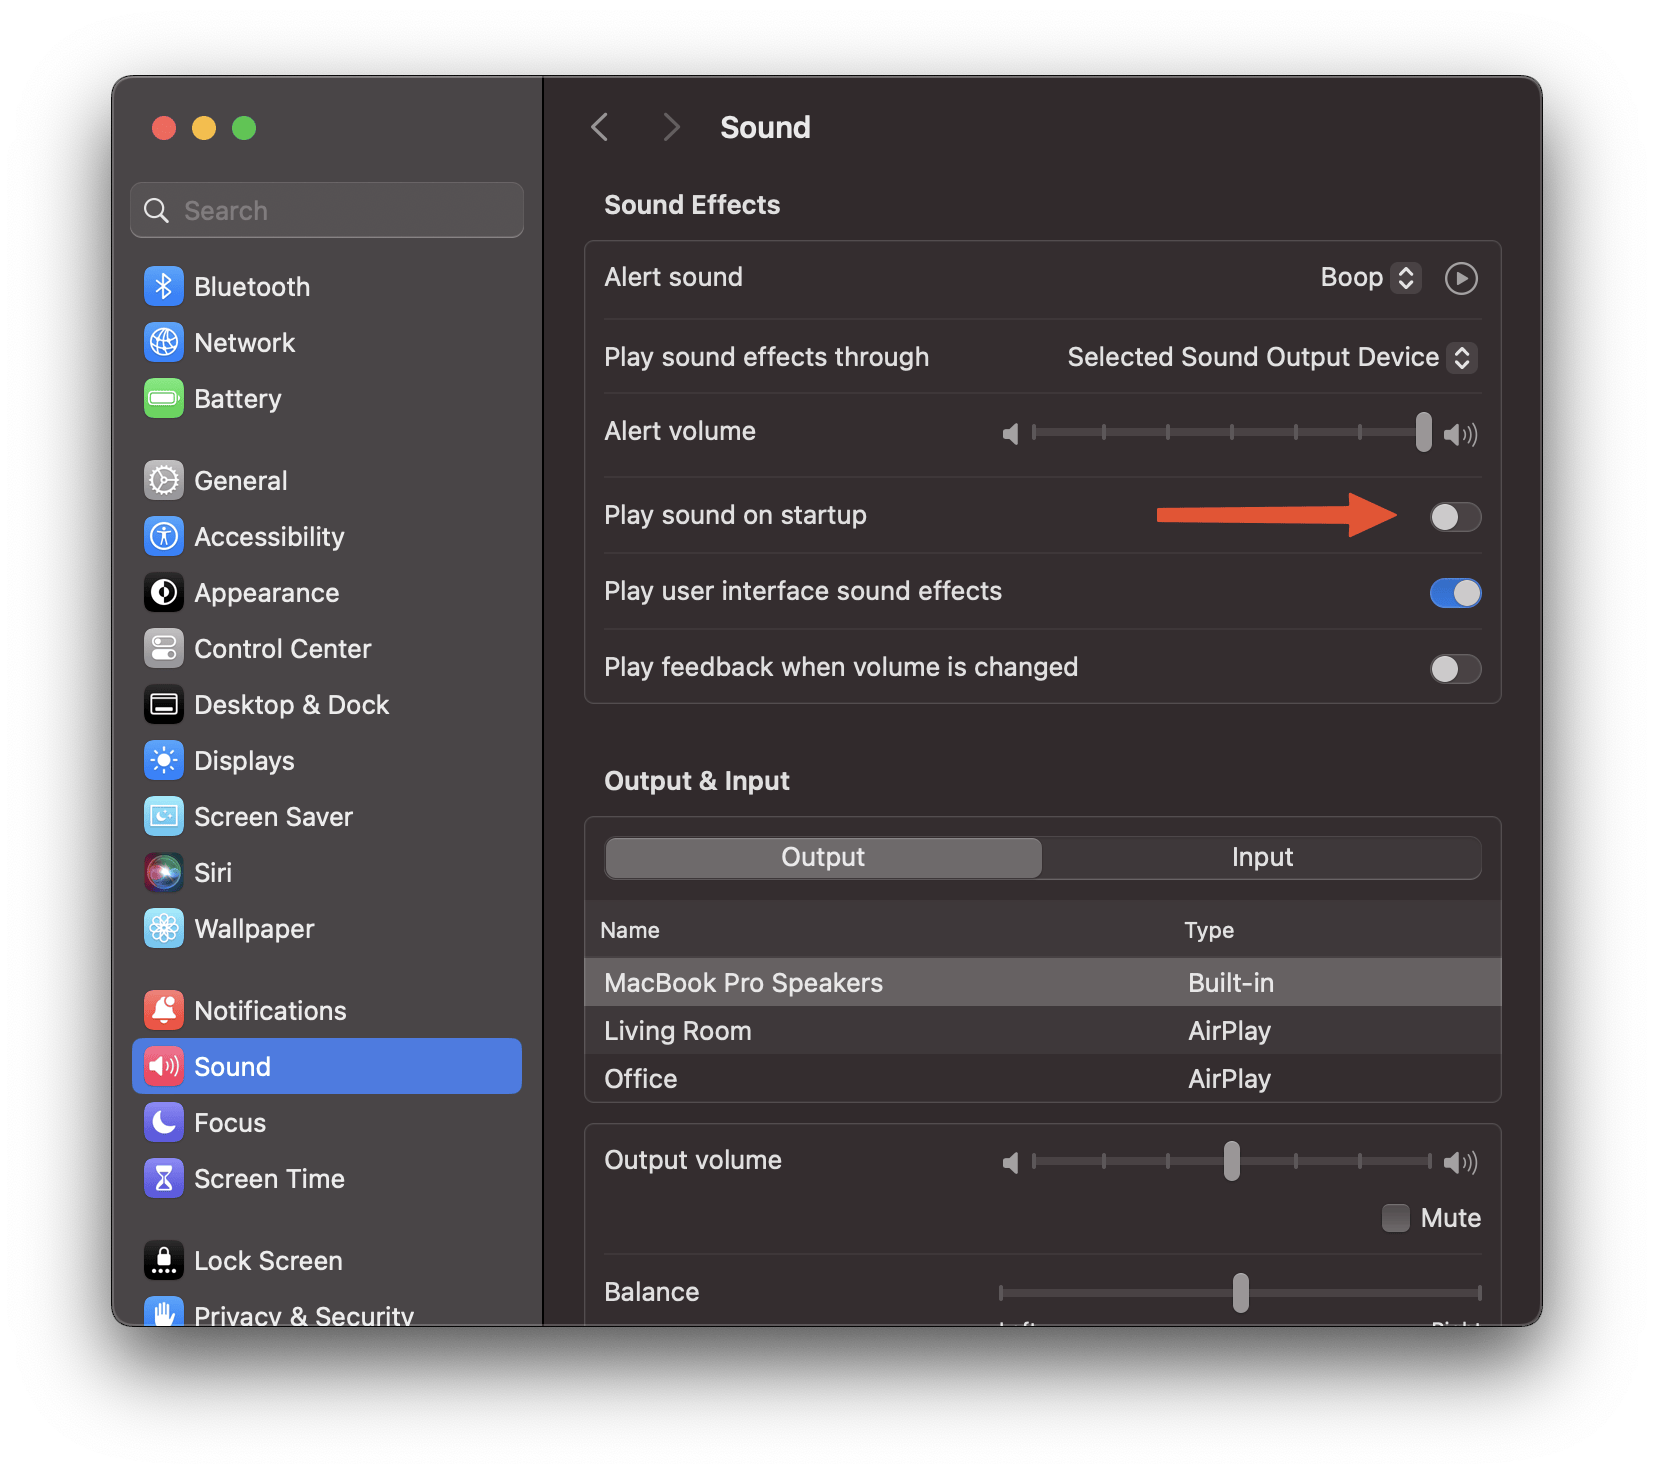
I recommend you to disable annoying boot up sound and sounds of notifications. You may need to disable most of the notification banners too, but it up to you. Especially for me, I prefer to keep only important notifications.
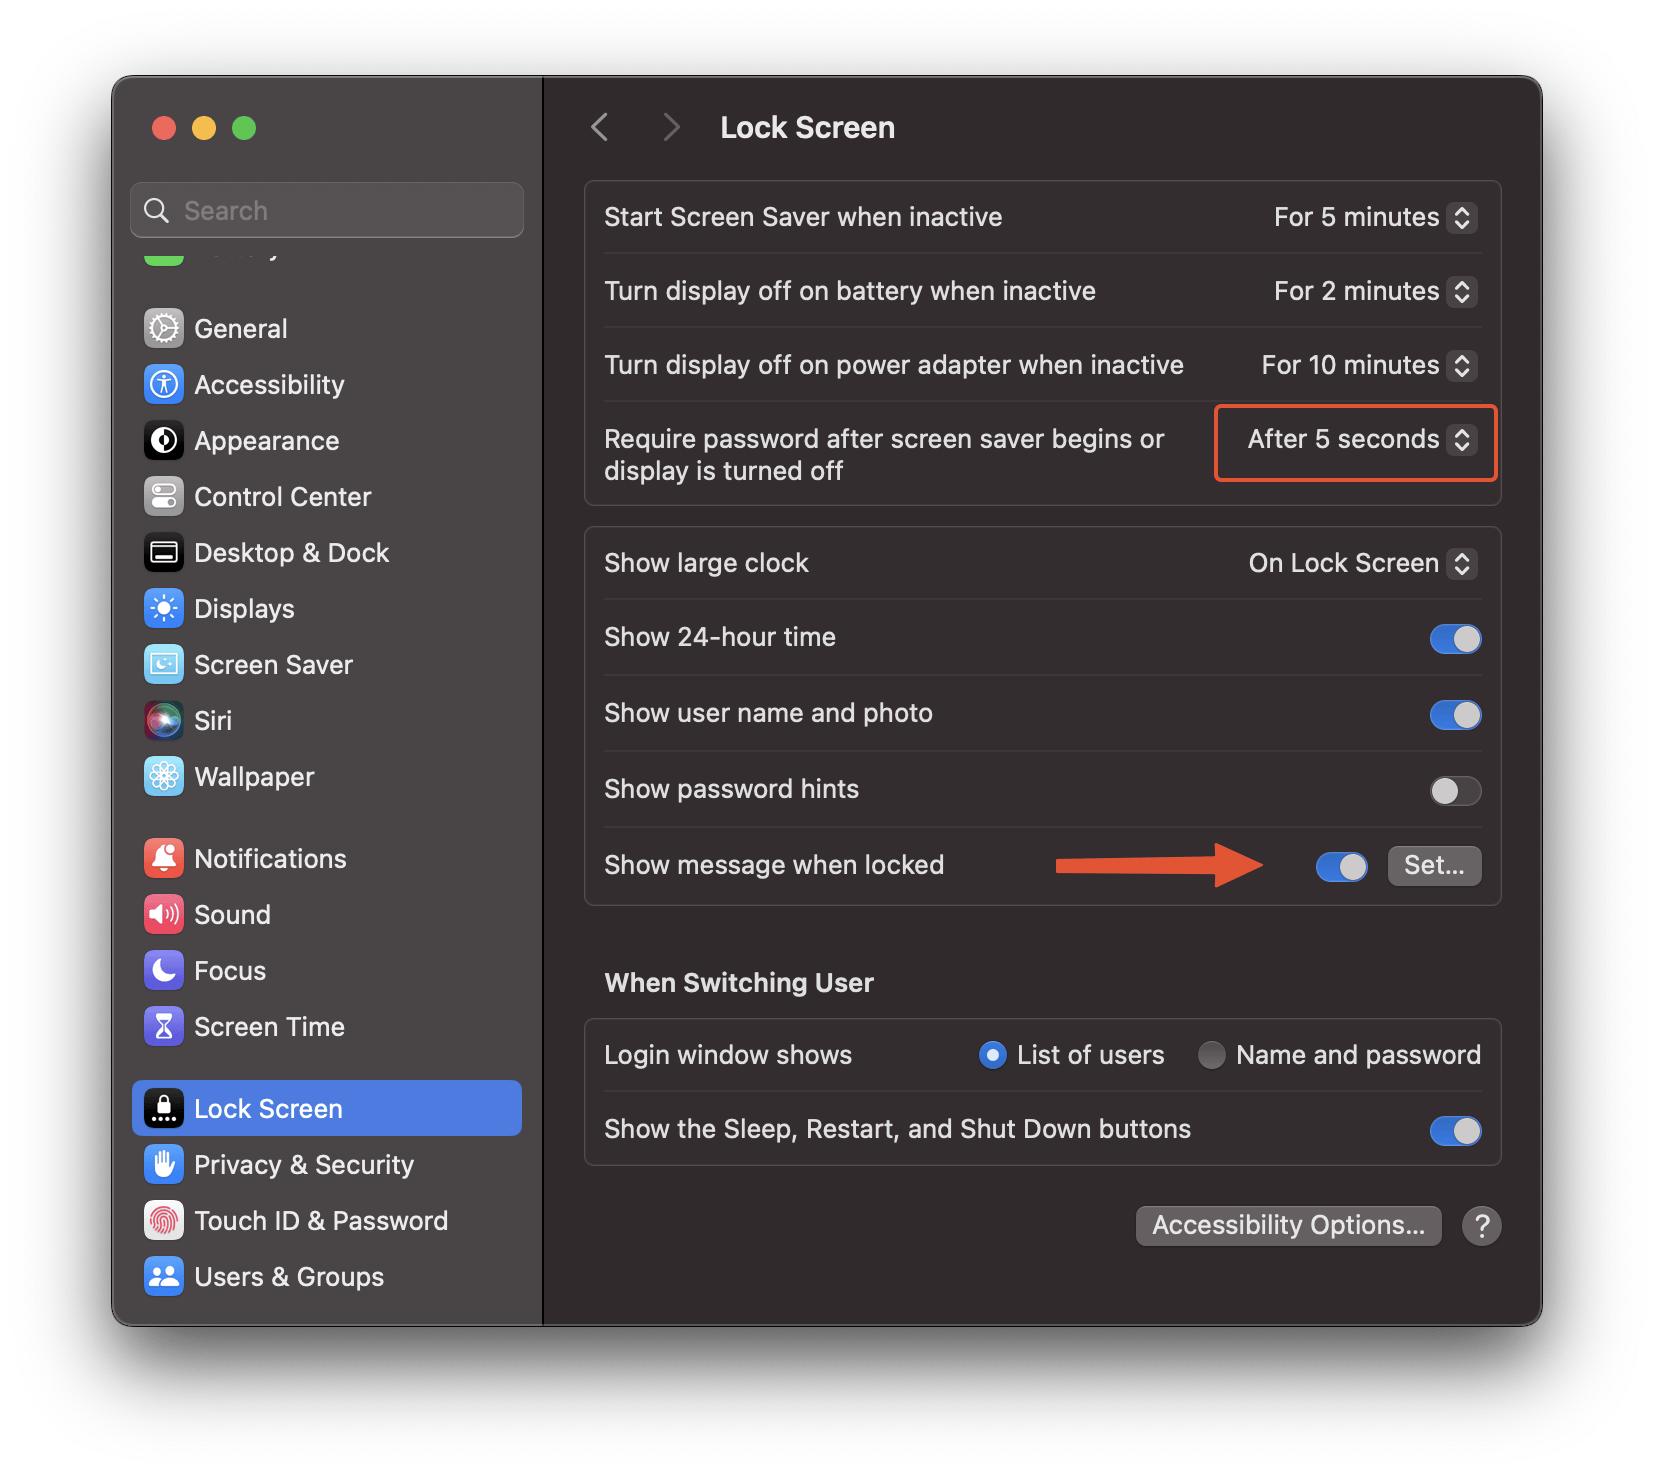
Let’s update some security preferences. I recommend you to require password after screen saver start, but to use 5 sec delay instead of immediately. But, if you do use iPhone mirroring app with automatic authentication - you’ll be forced to use immediately lock-up. Also, you may need to set a lock screen message, e.g. your favorite saying :)
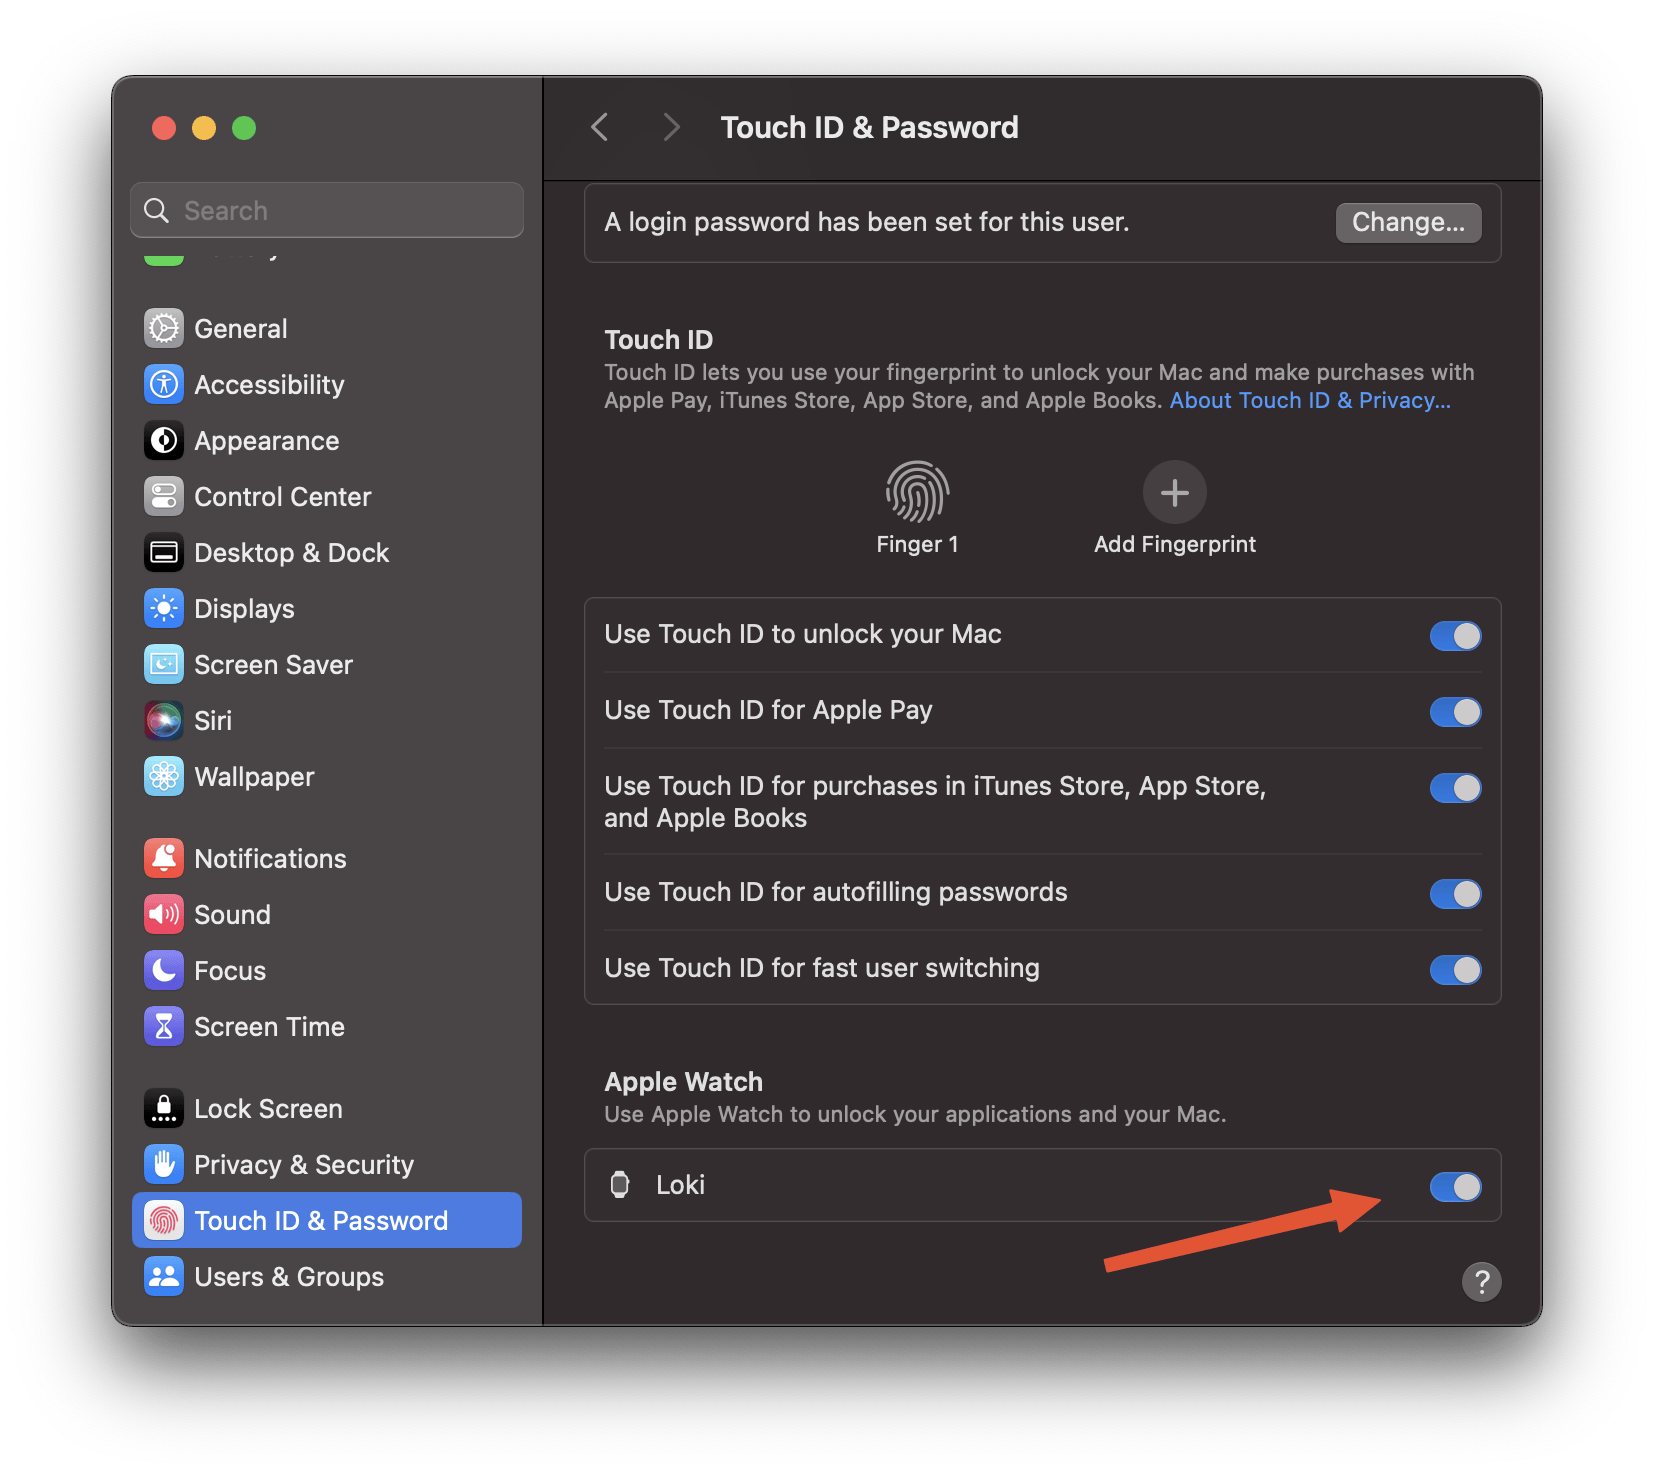
If you’re an owner of an Apple Watch, you can set up to unlock your MacBook/iMac using the device on your wrist.
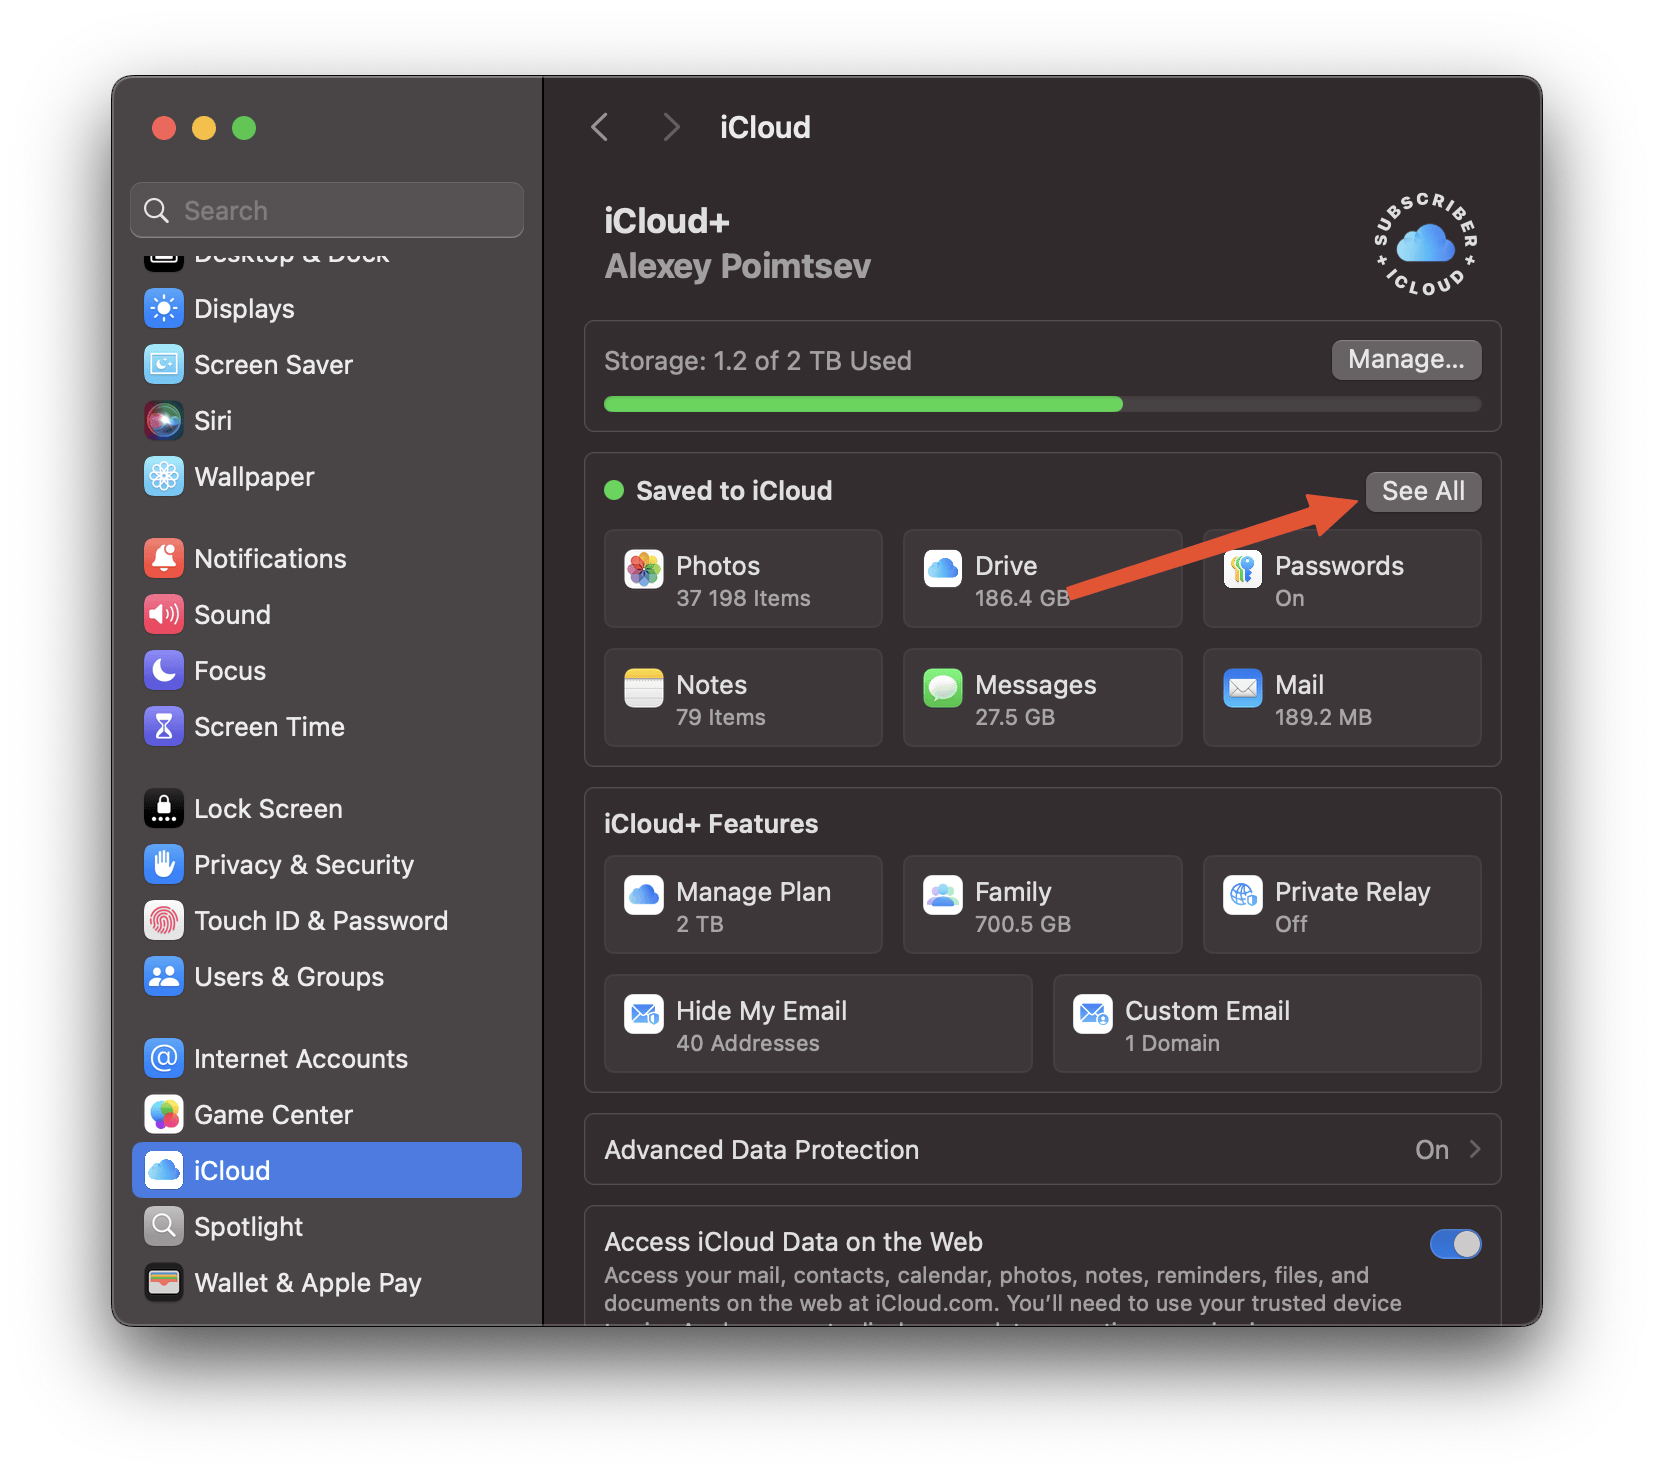
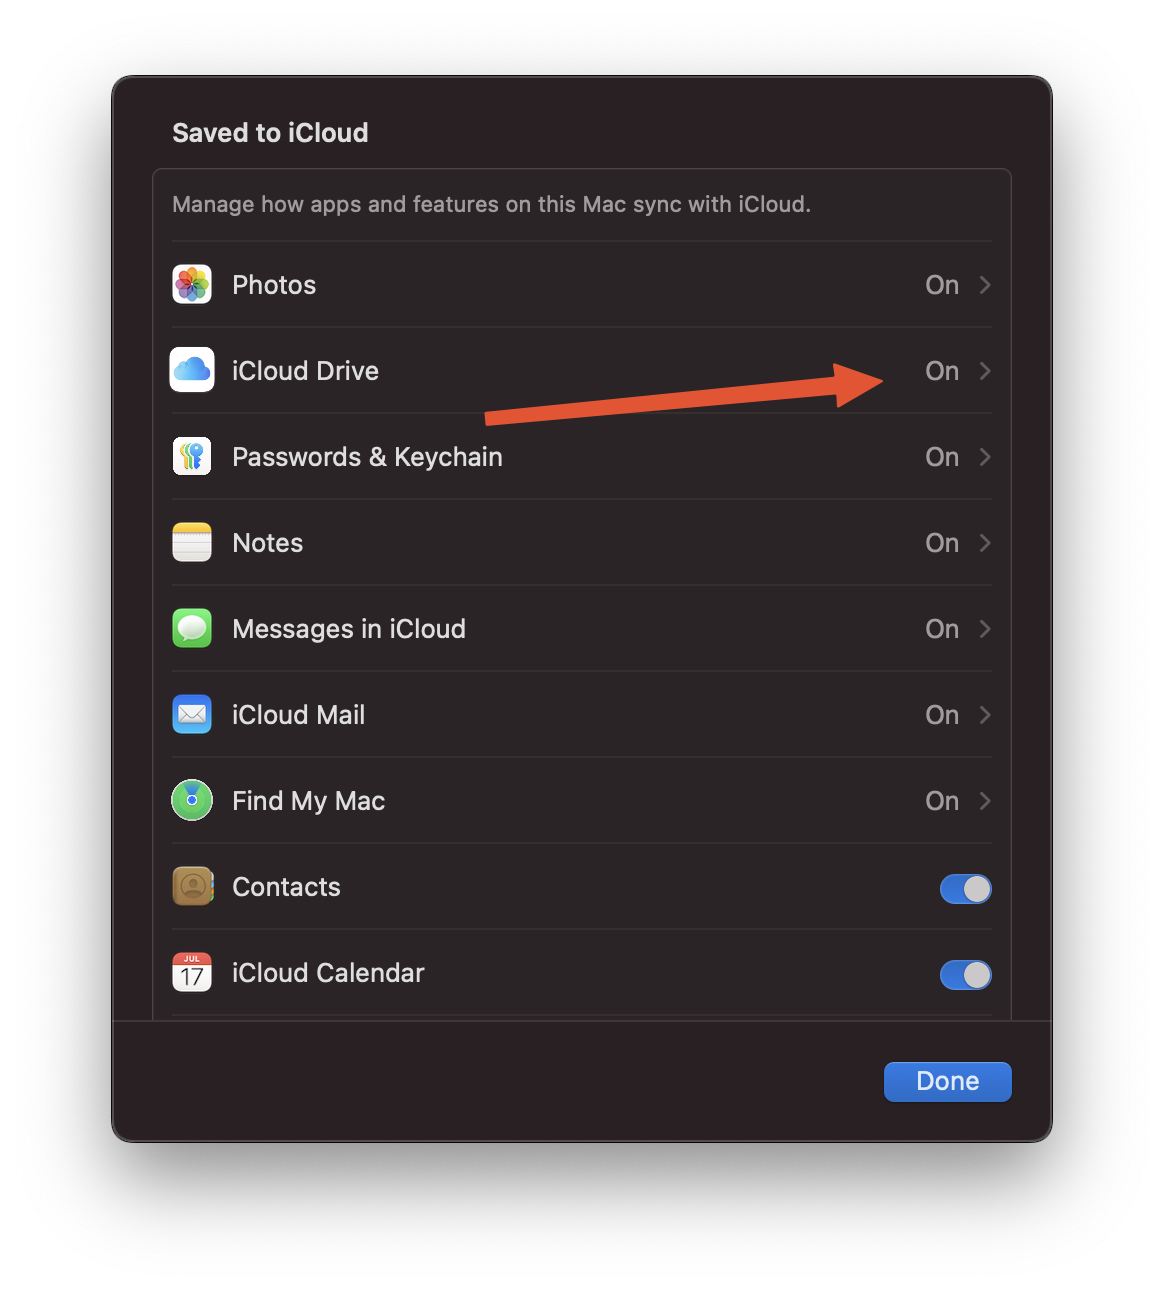
In case if you have any iCloud subscription - don’t forget to enable Documents and Desktop folders sync.

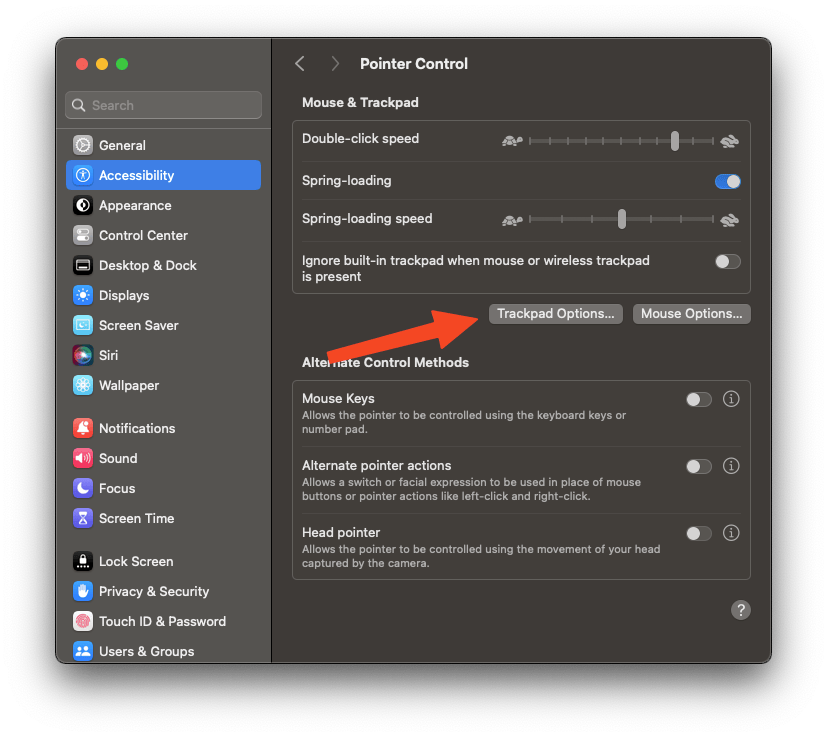
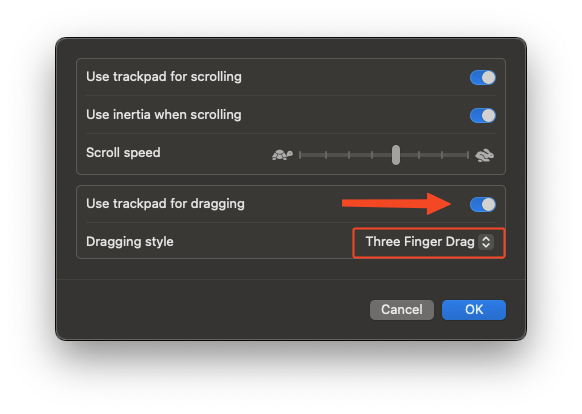
Next step - trackpad configuration. I recommend to set up tap-to-click, App Expose …
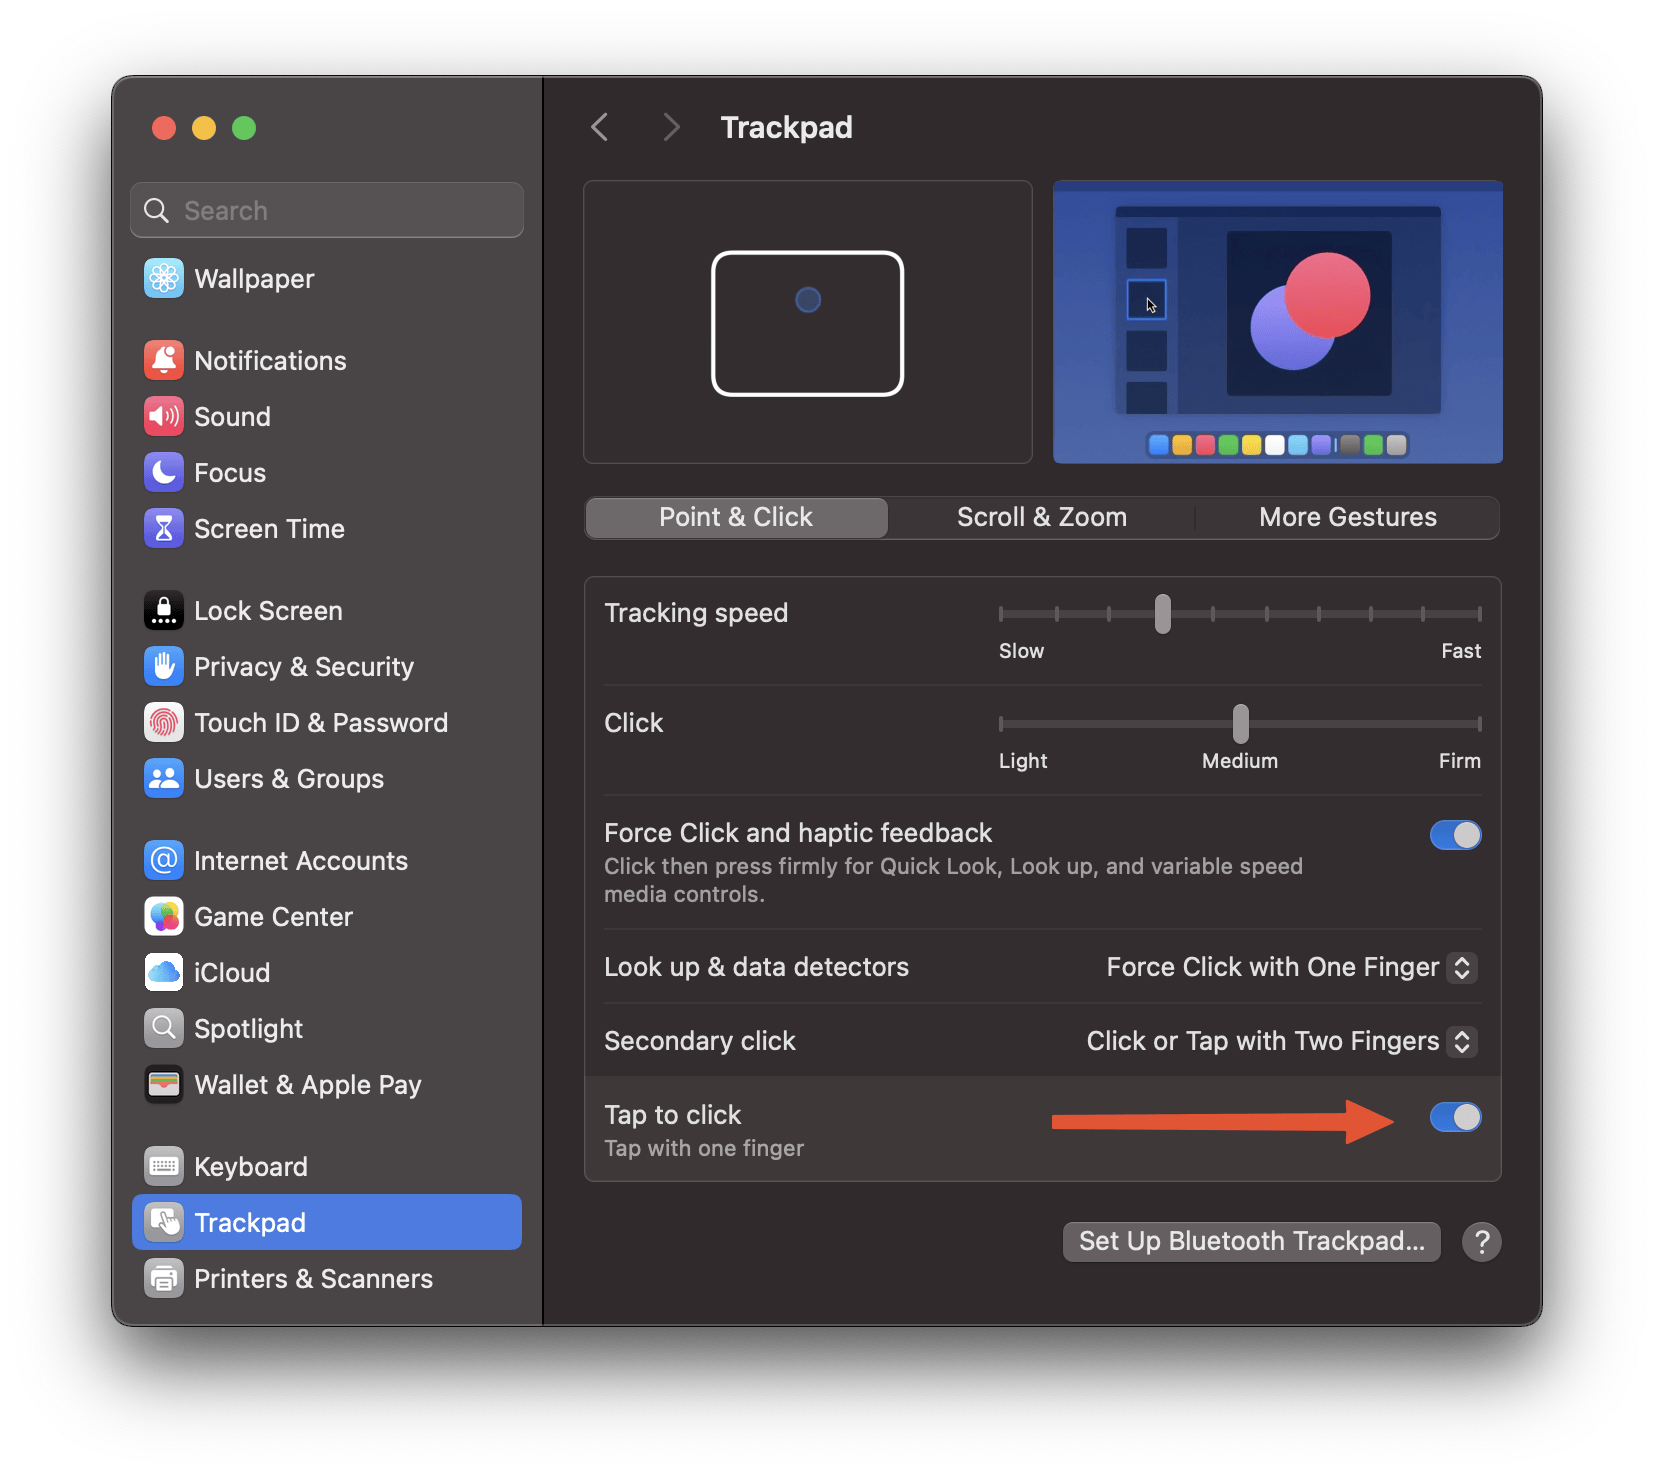
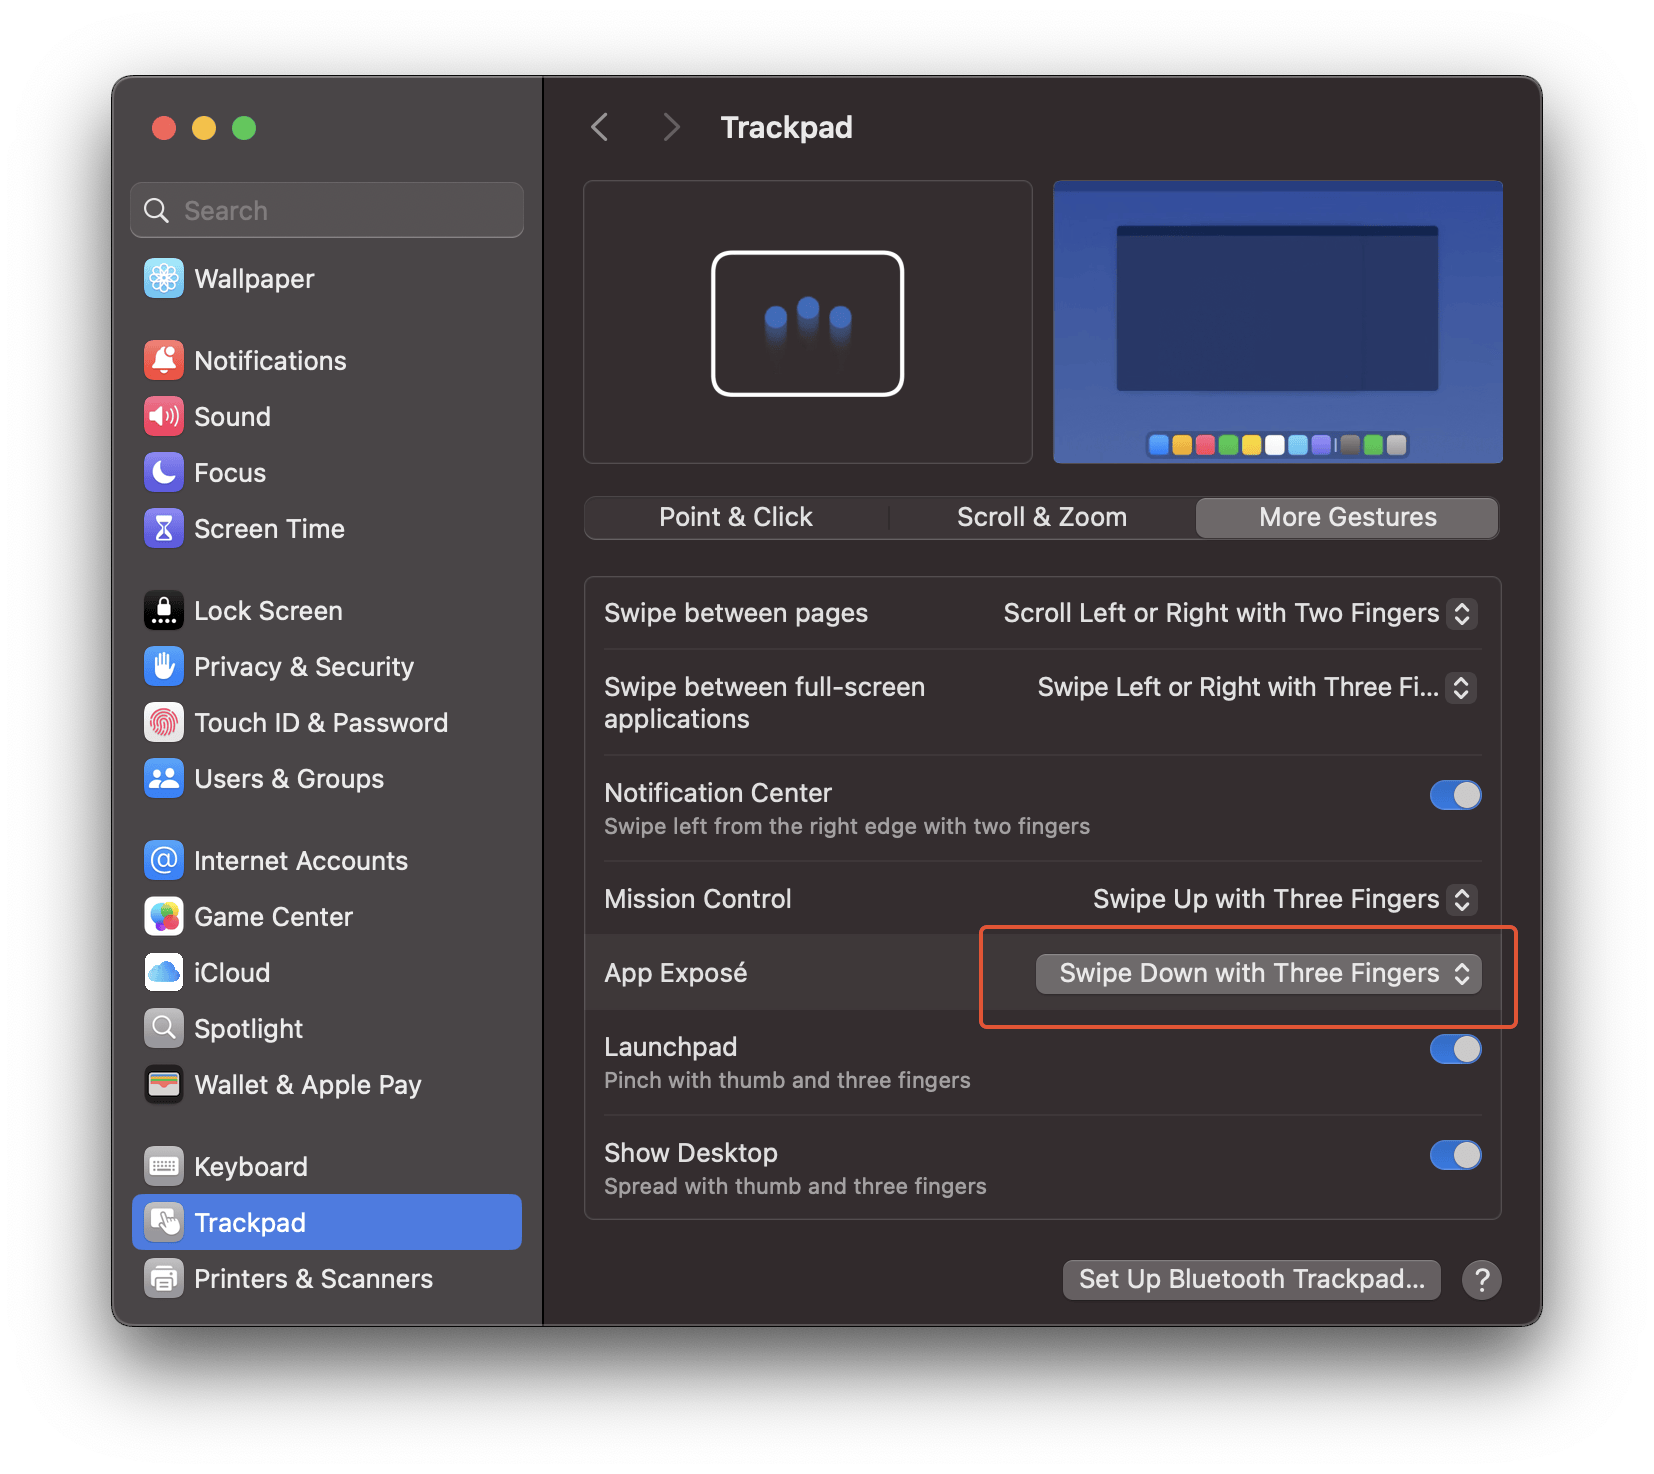
… and windows dragging with 3 fingers.
#Desktop
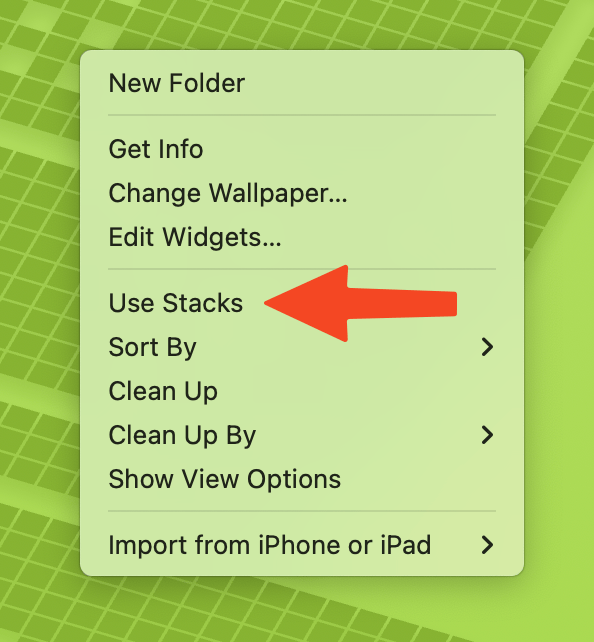
To keep desktop (almost) clean - I recommend to use stacks (right-click on the desktop).
#Dock
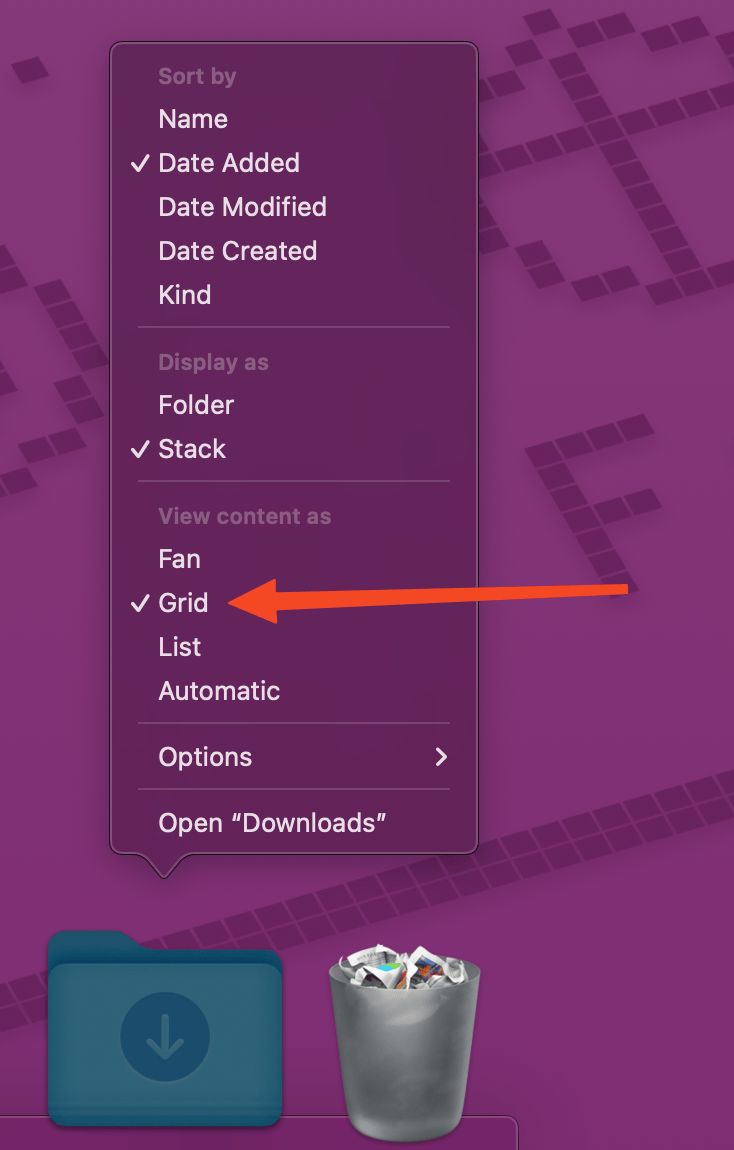
Let’s do cleanup our dock and remove icons of unused apps, just drag icon away from your dock and release somewhere on the desktop. It is my personal preference, but I like to see Downloads folder in dock displayed as a stack and content displayed as a grid.
#Launchpad
You may need to sort applications on the Launchpad screen, grouping them to folders.
#Finder
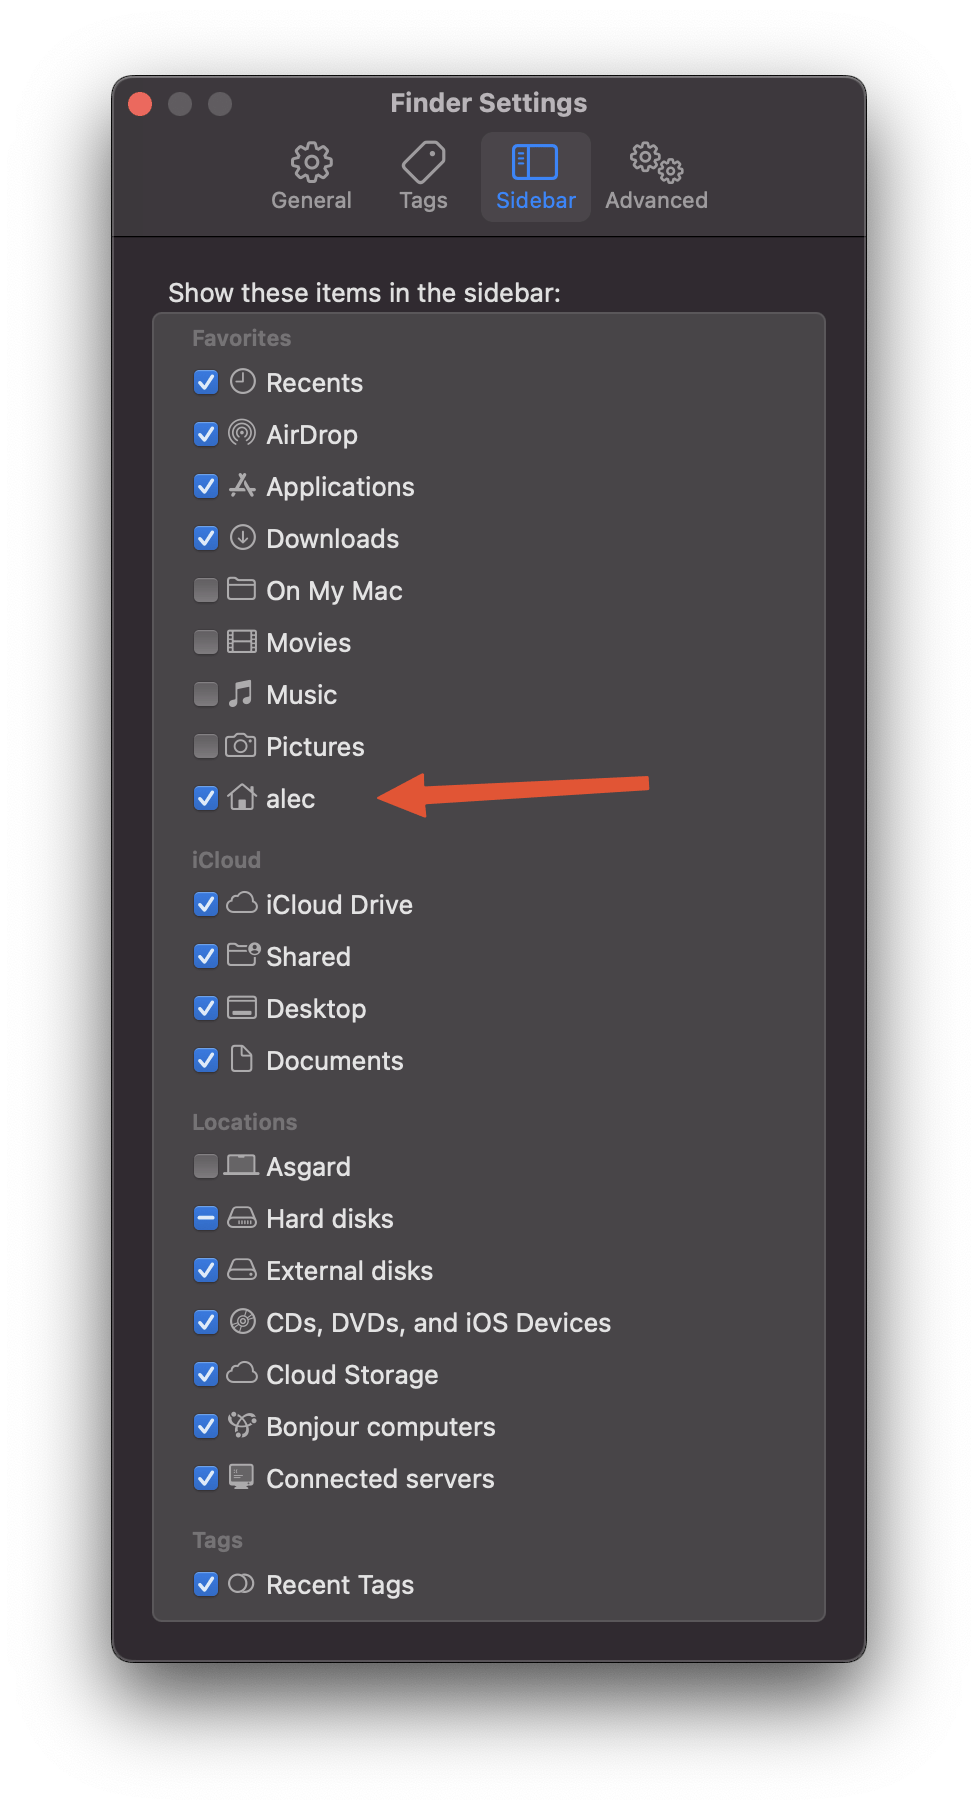
Let’s do some tweaks for Finder. You may need to show some places in the sidebar (e.g. home folder) …
… show filename extensions, automatically empty trash, start search in current folder …

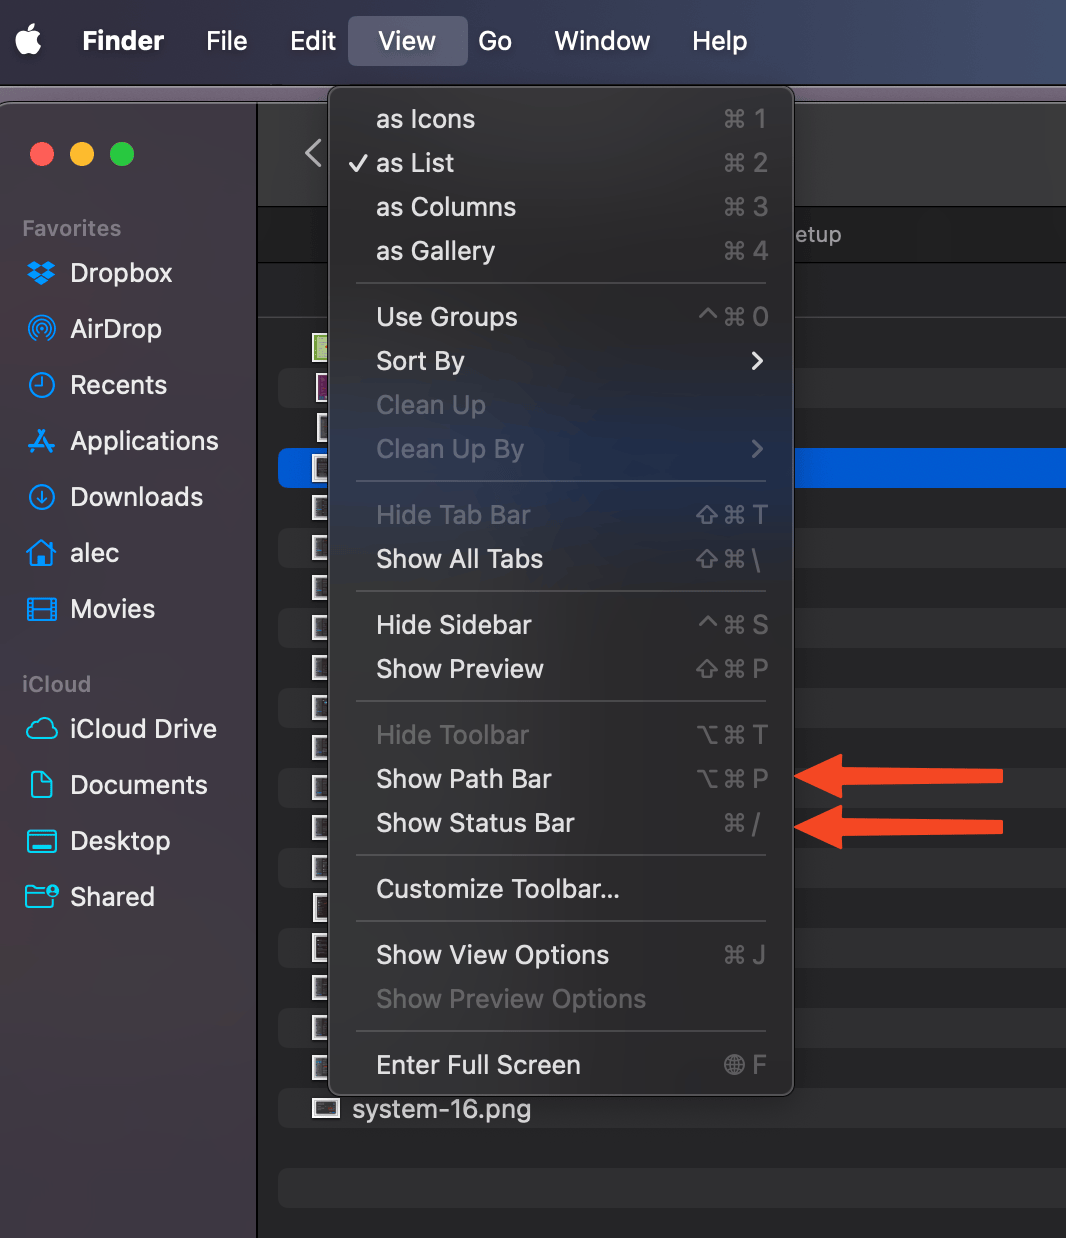
… and show full path and status bar at the bottom.
Also, you may need to customize your toolbar and to add additional buttons, but it is up to you :)
#Safari
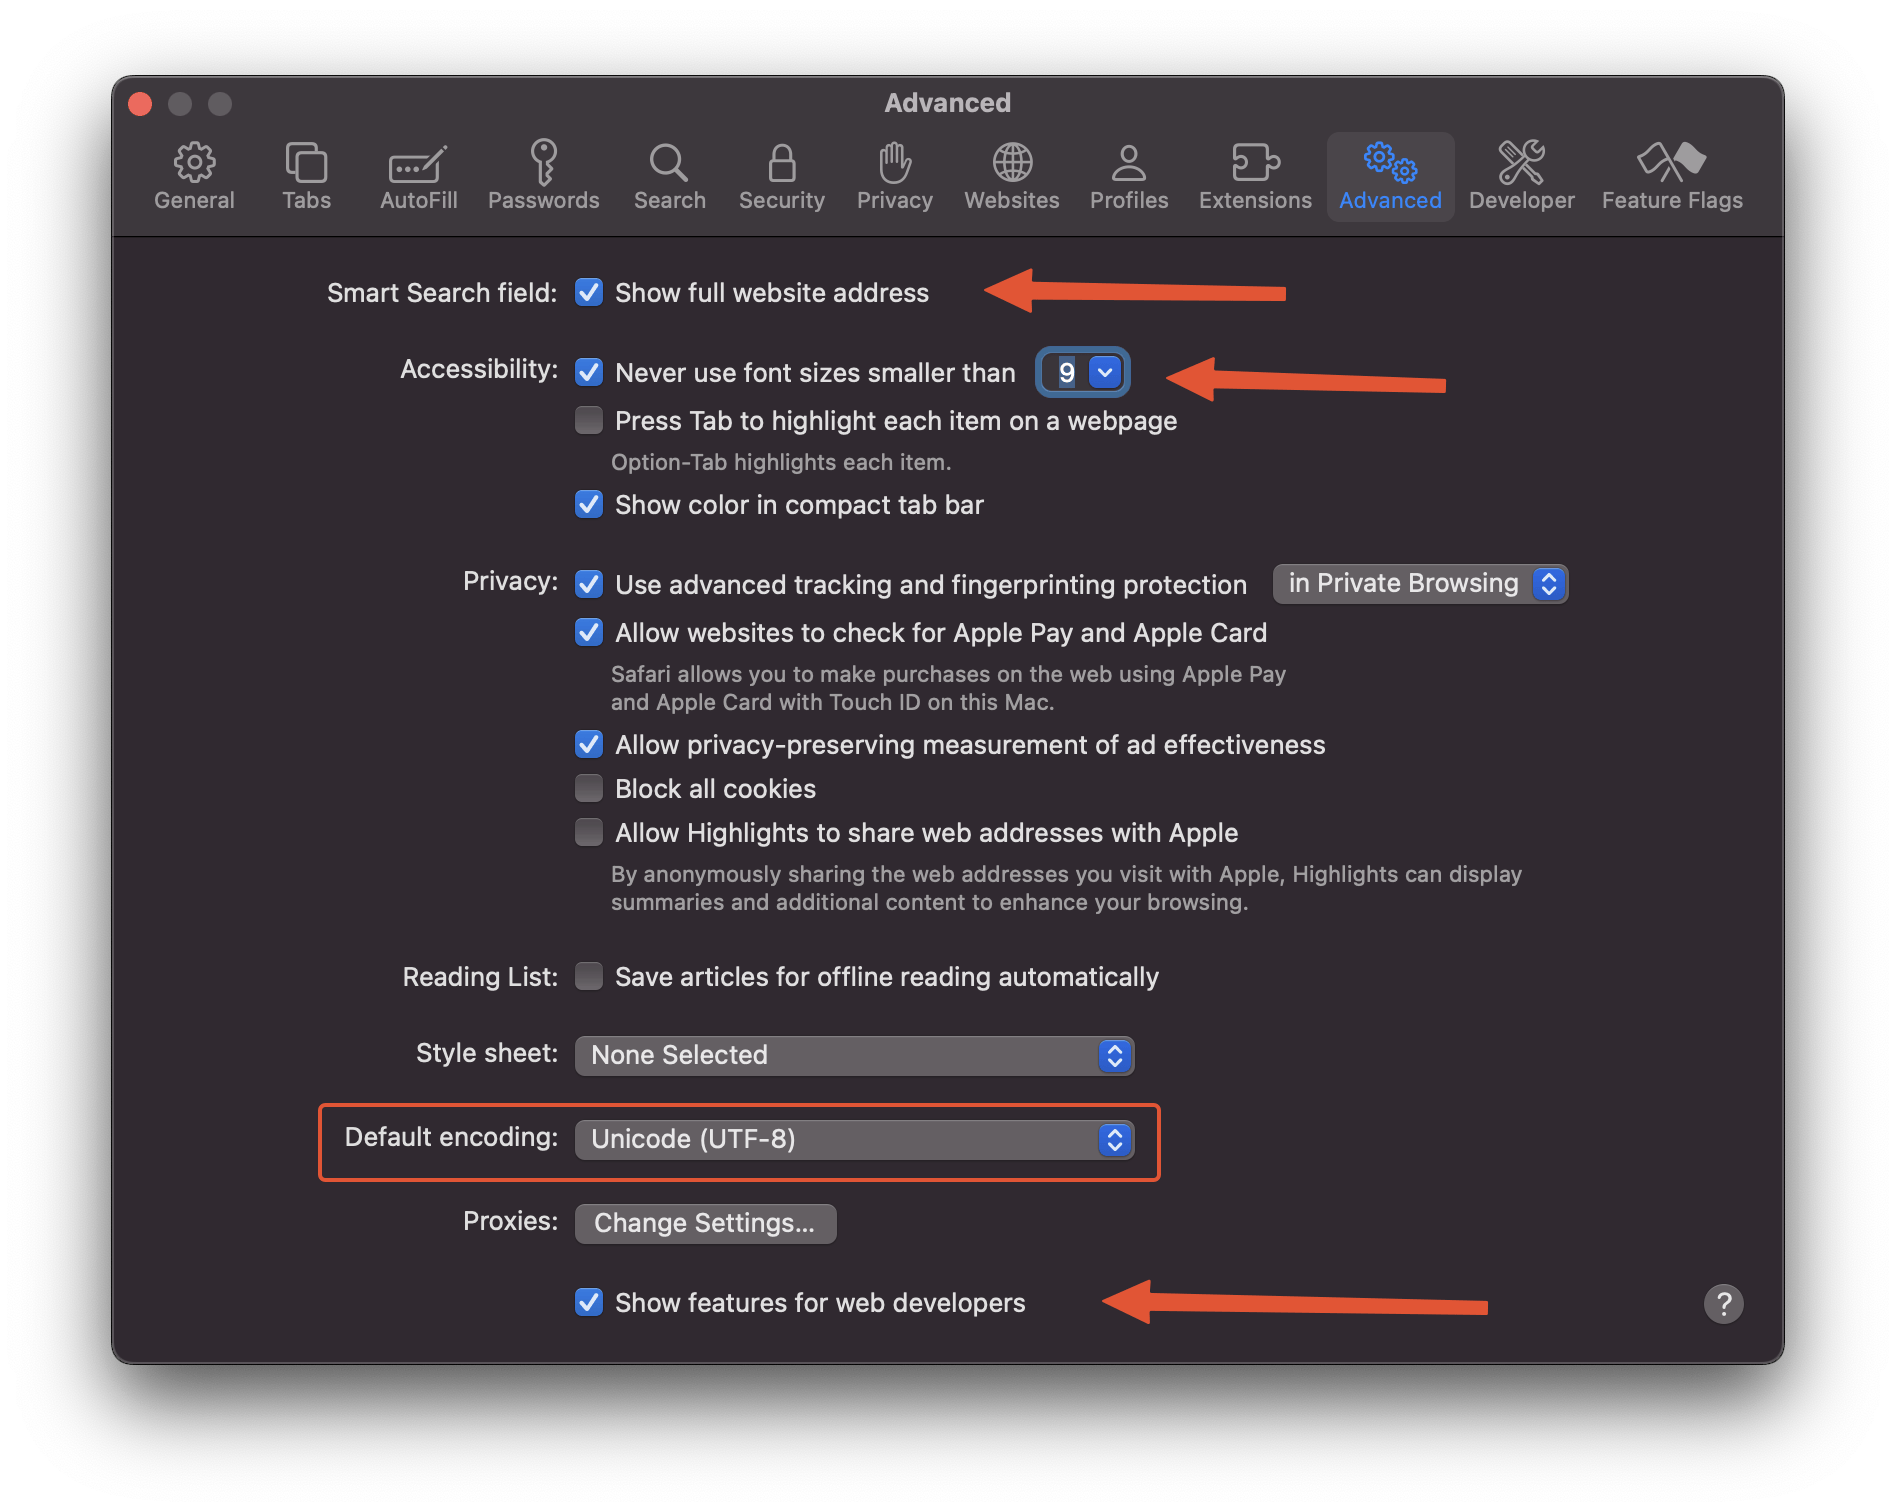
Some tweaks for Safari. I recommend to disable option to “open safe files”, …
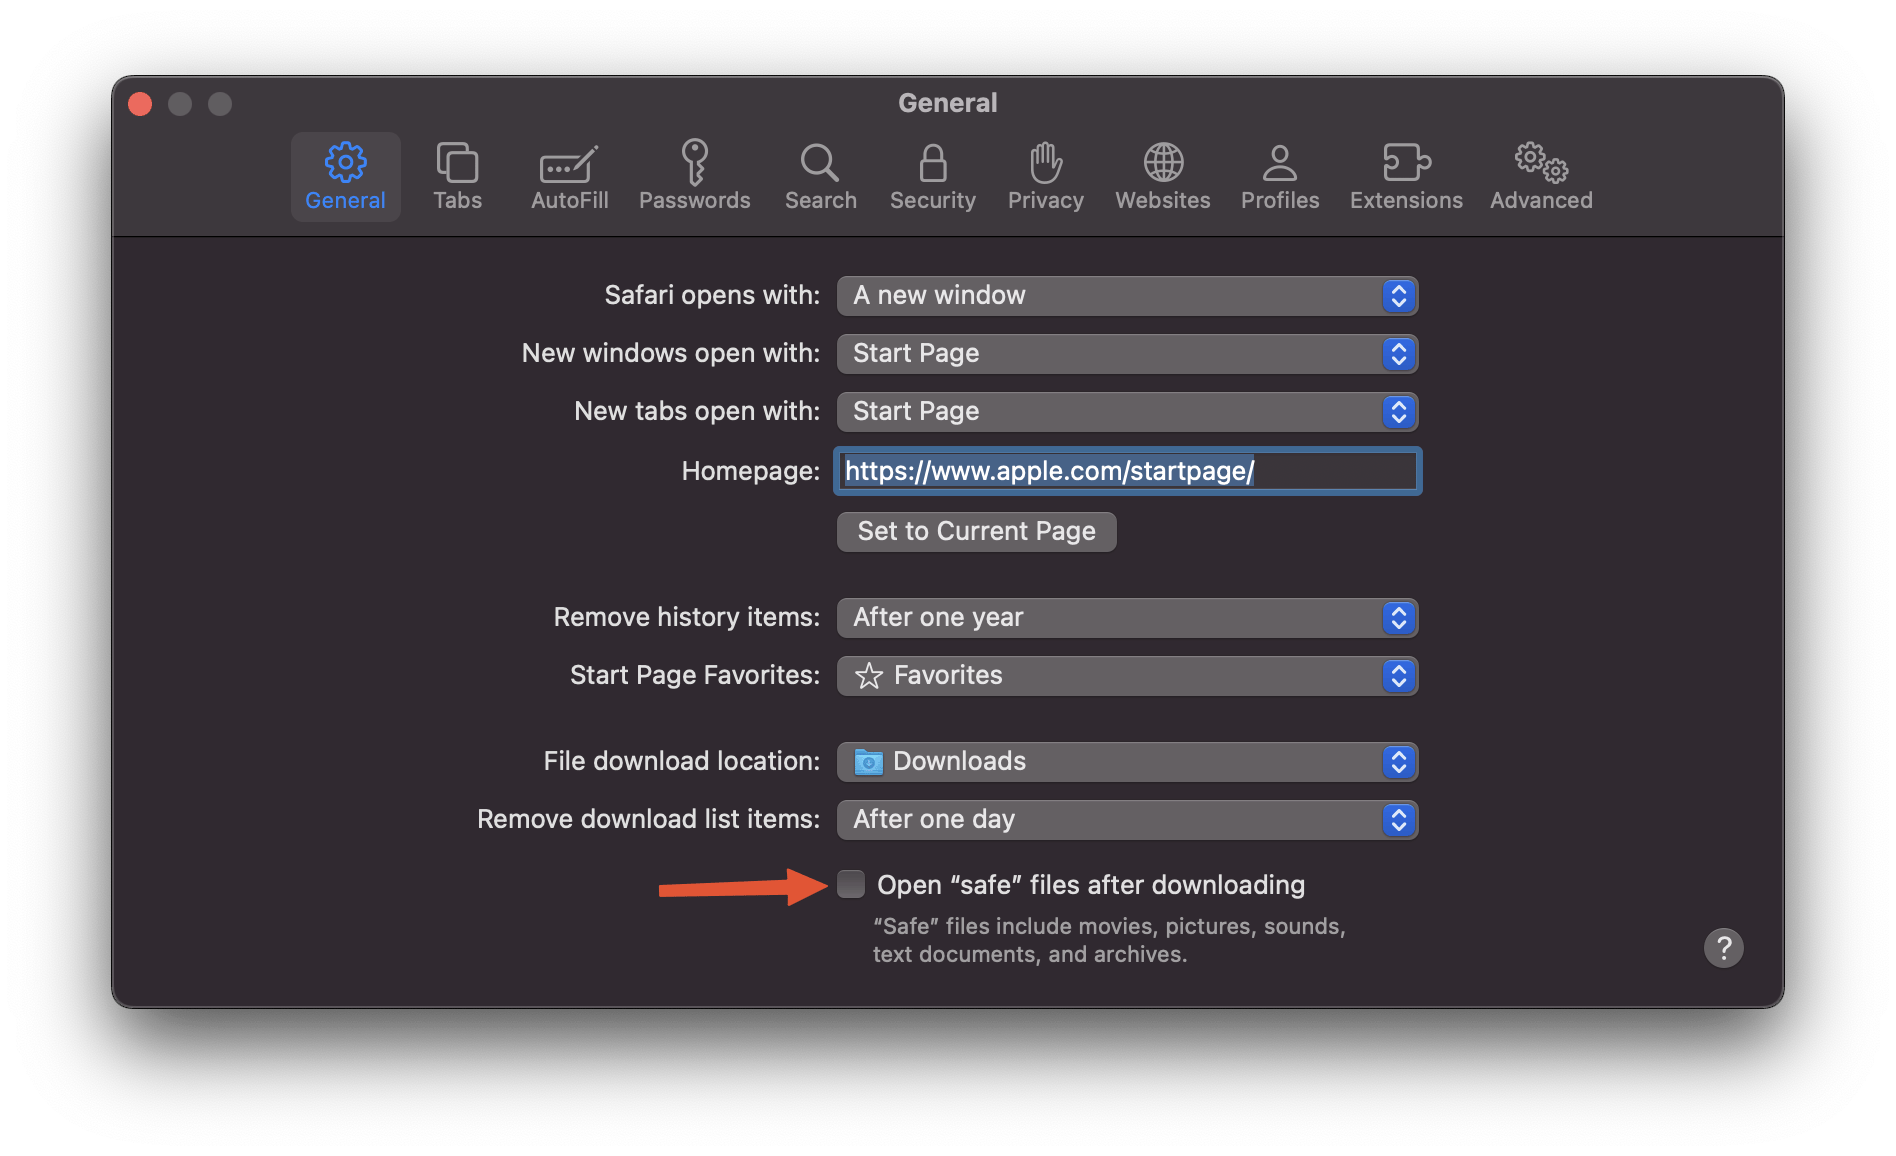
… show full URL, set minimum font size and. Because we are developers (isn’t it?) - enable developer tools in browser.
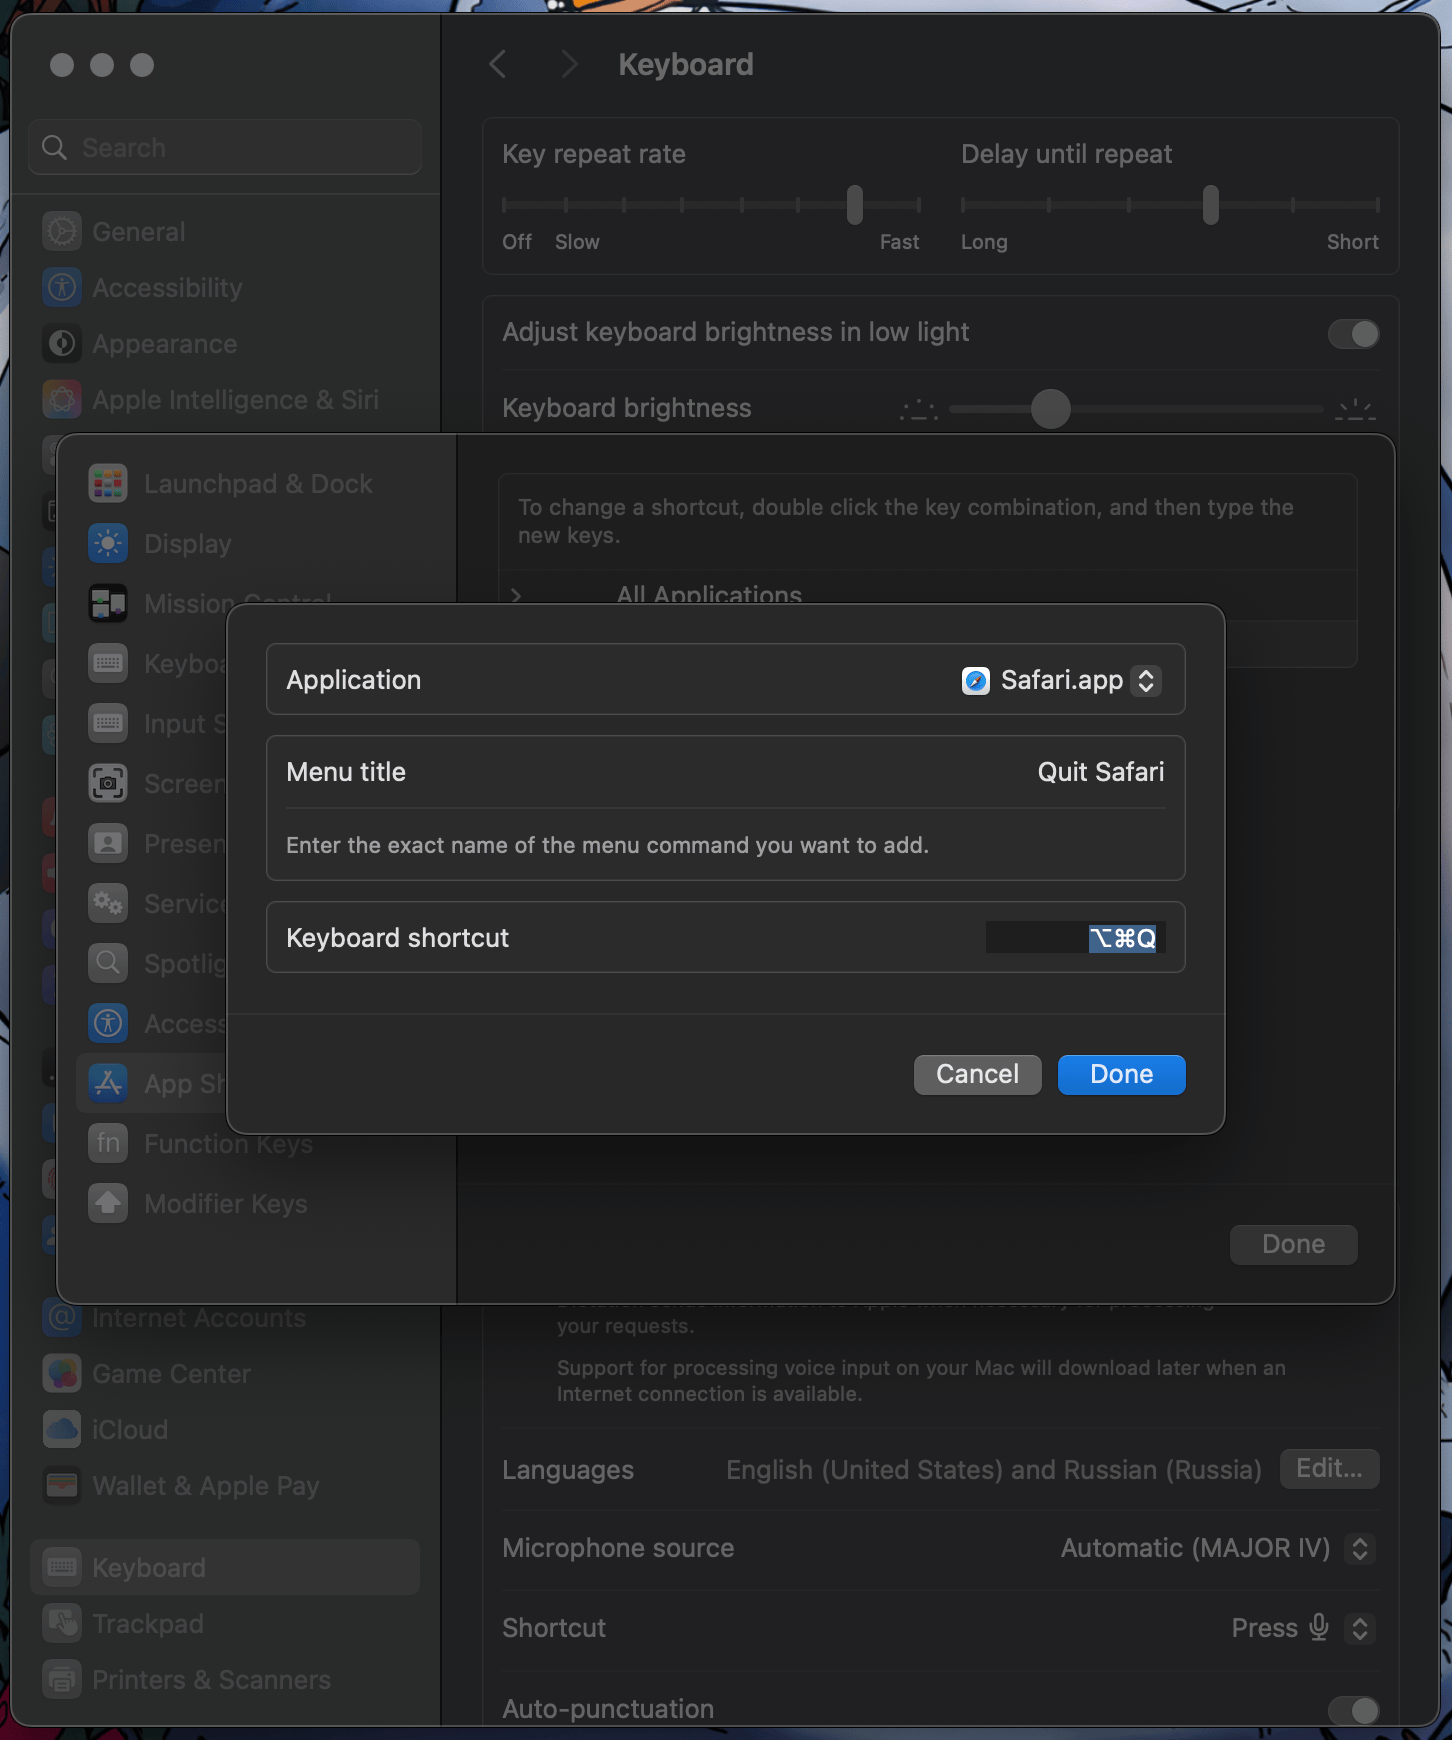
One more useful tweak for Safari. To prevent accidental quit from the browser - you can configure another hotket from the system settings. Go to the System settings -> Keyboard -> Keyboard Shortcuts. Then choose Safari, then Quit Safari and your own hotkey. Voila!
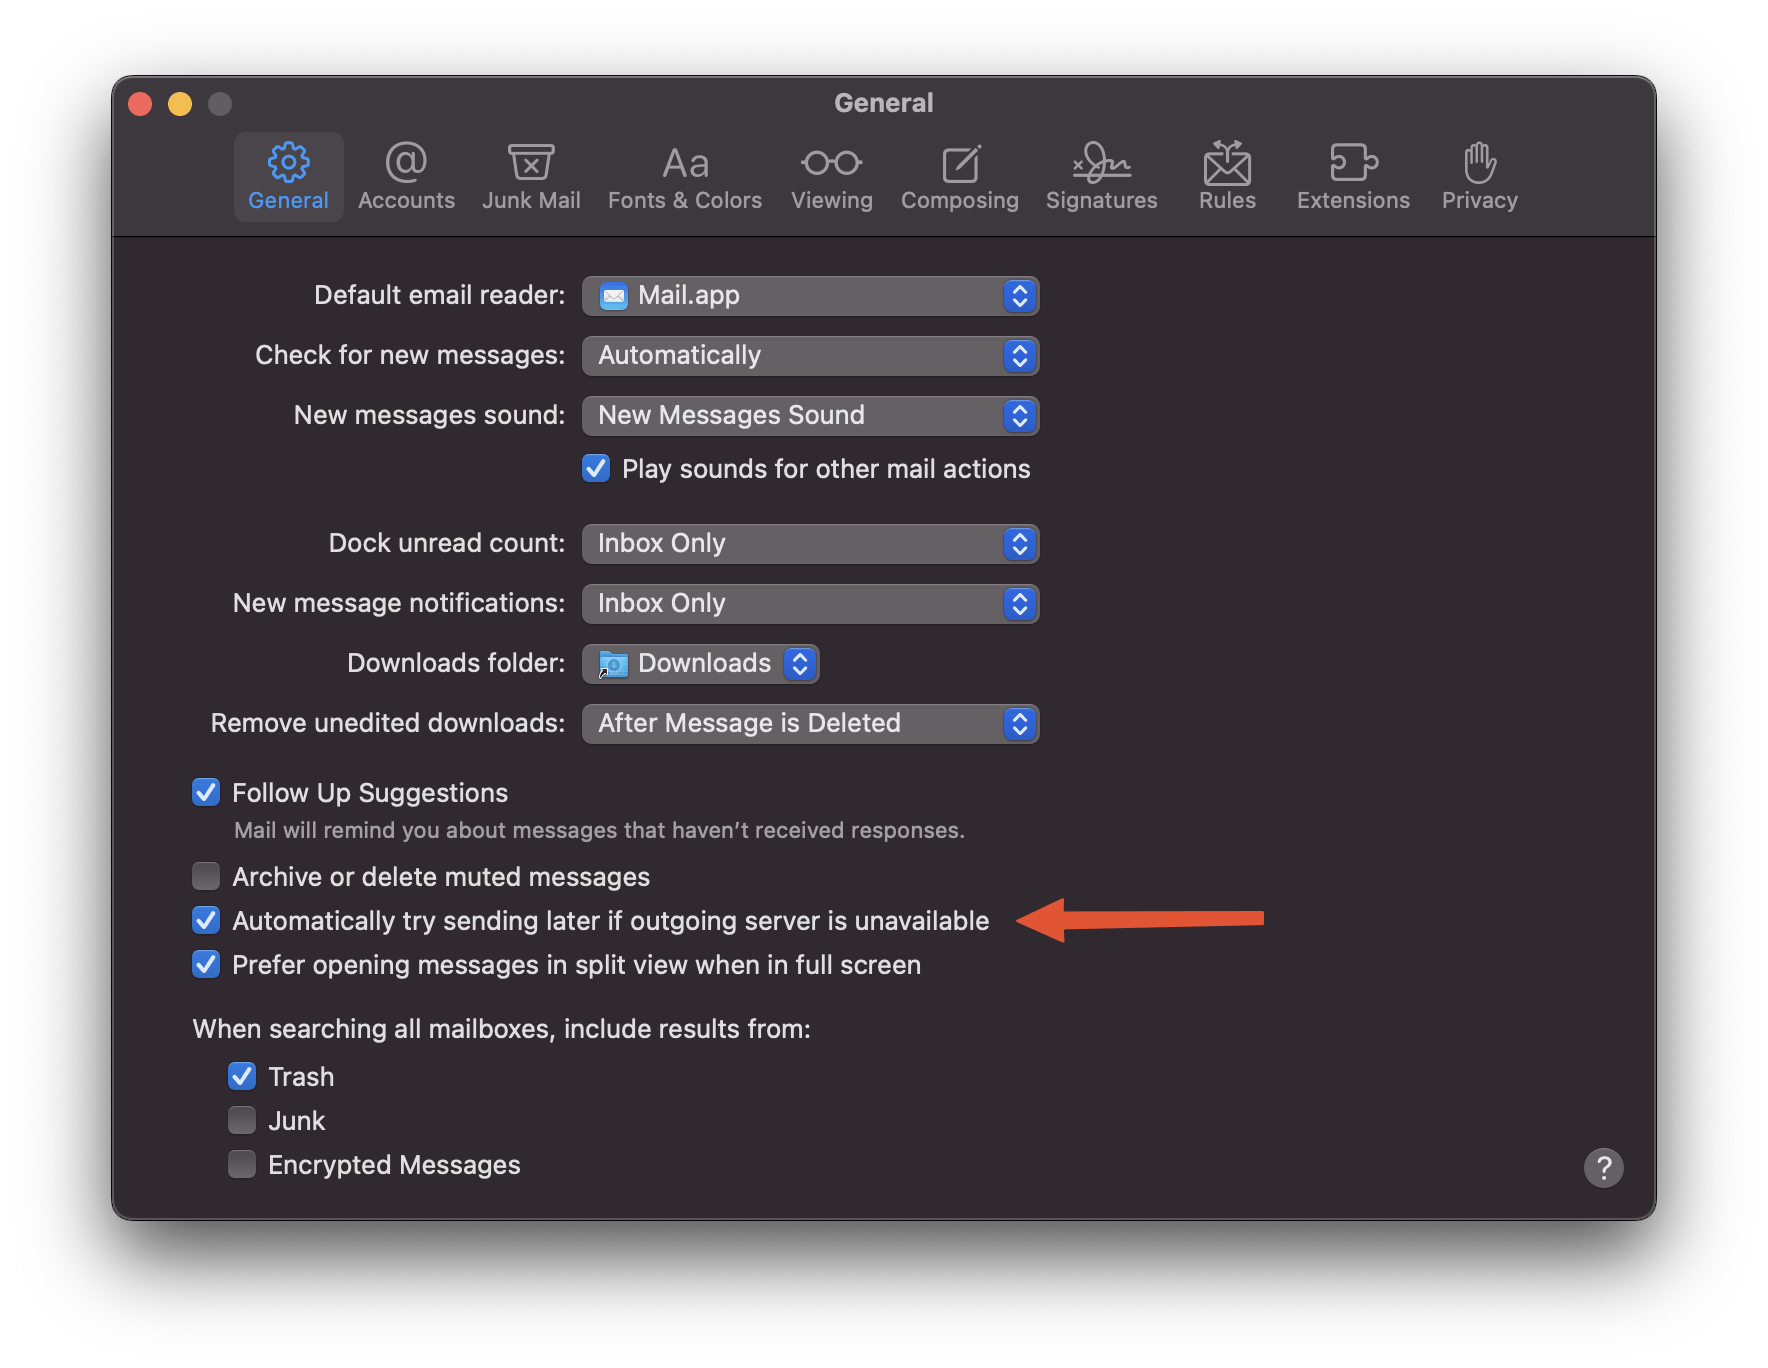
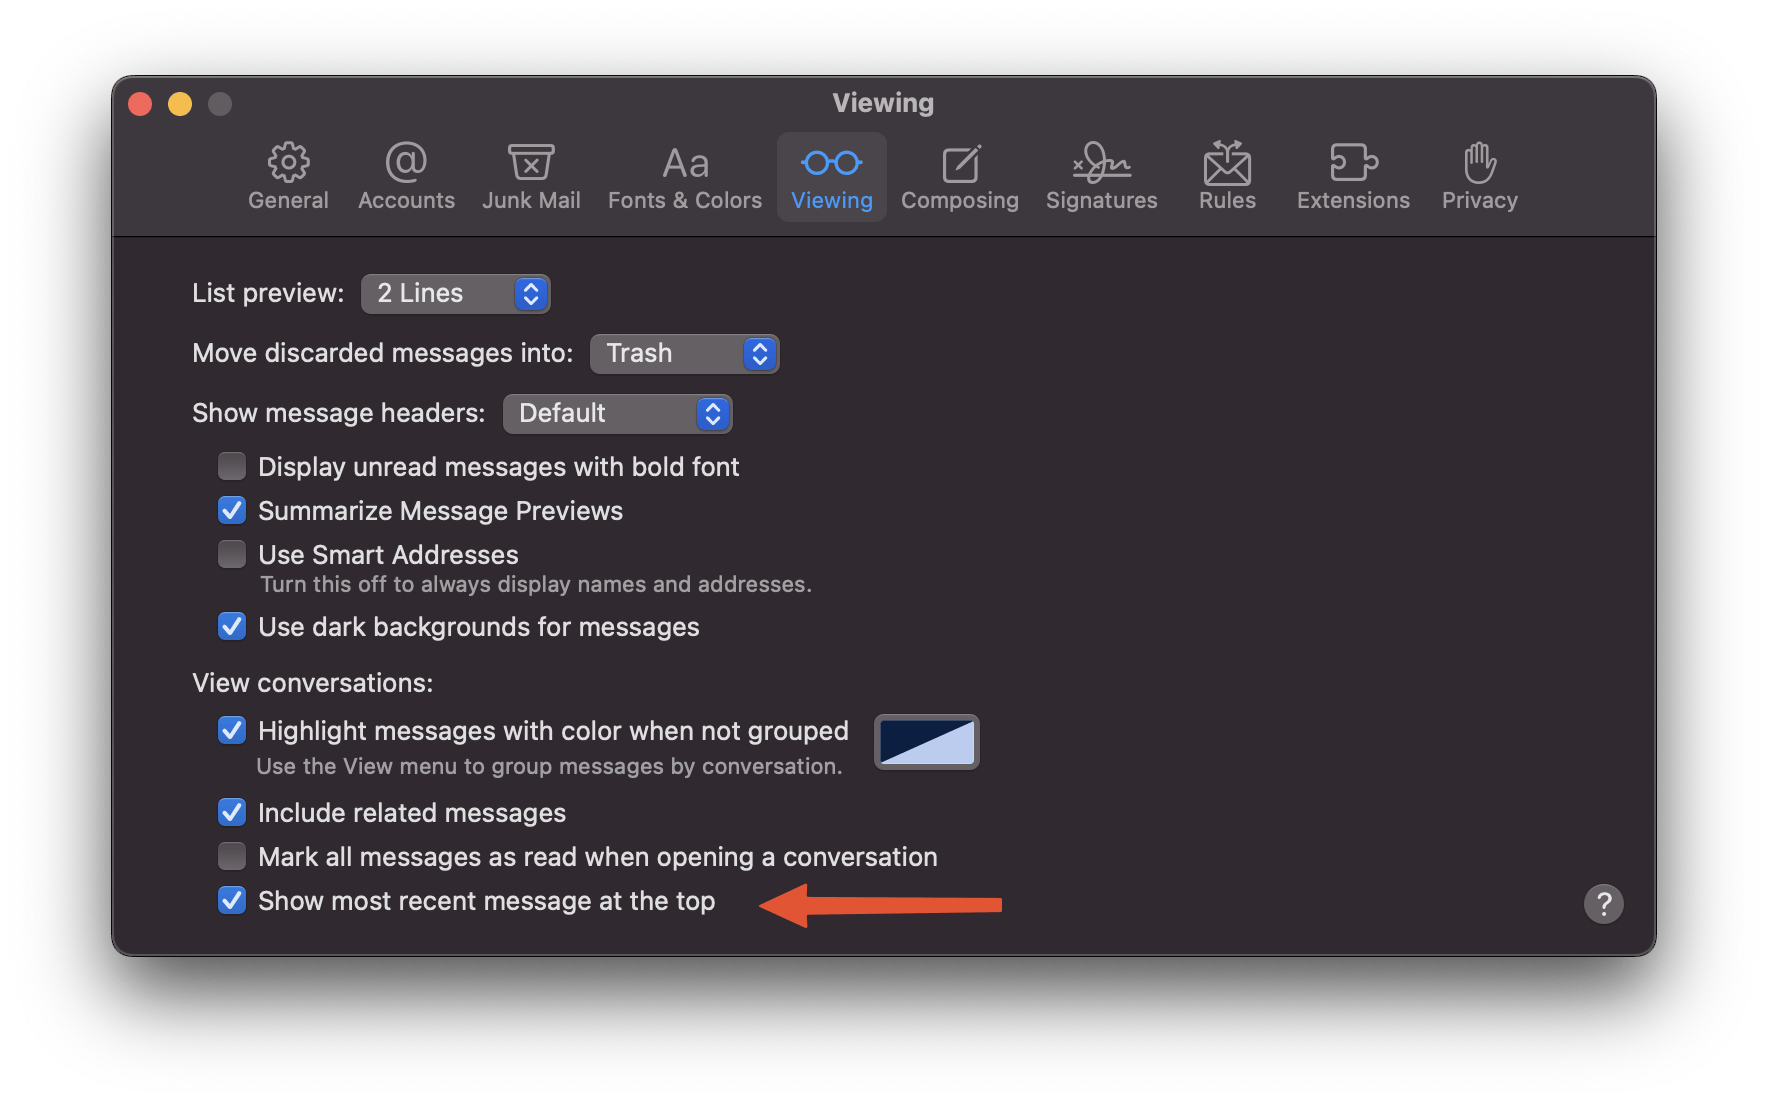
Next stop - Mail.app. Let’s enable the option to resend email in case if SMTP server isn’t available.
Then enable junk mail filtering and …
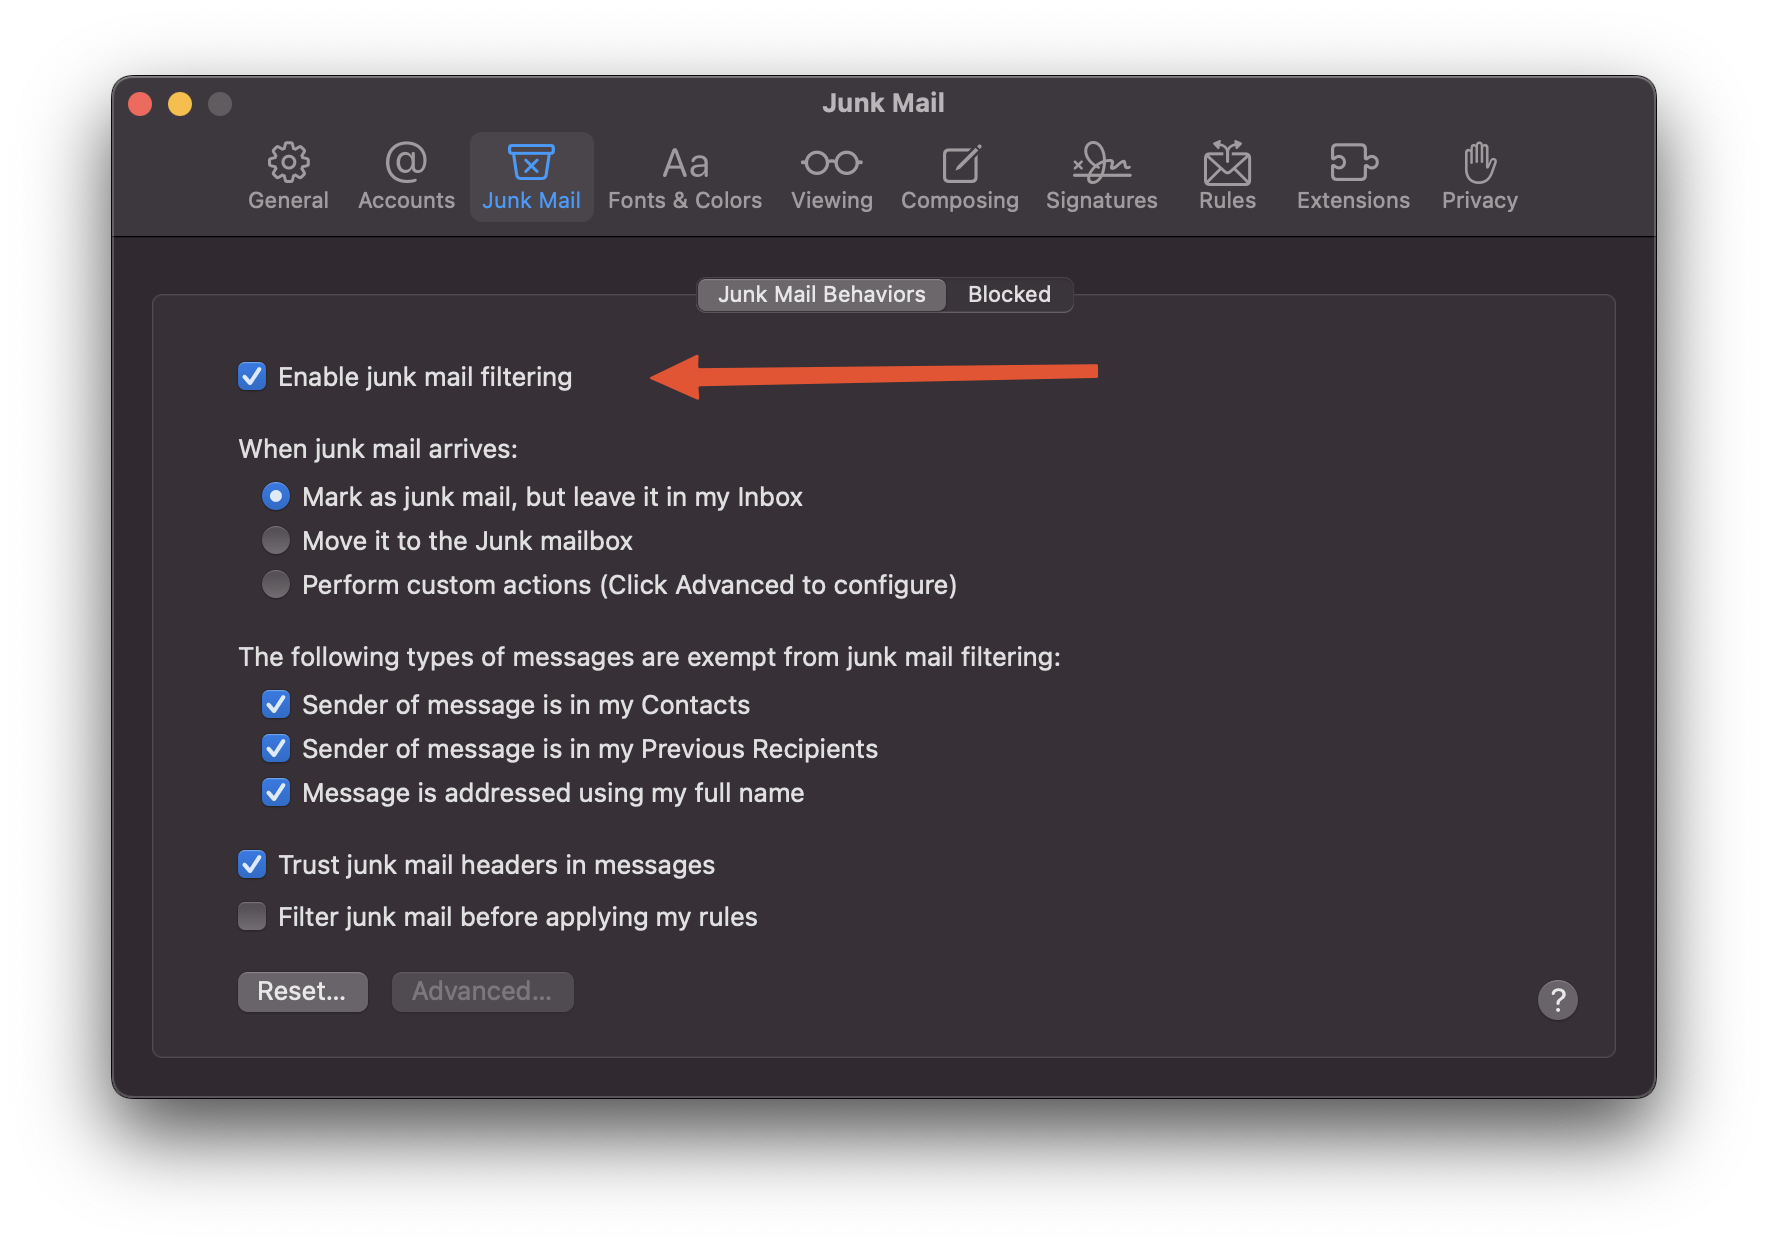
… change sorting order to display latest mail on the top of the list.
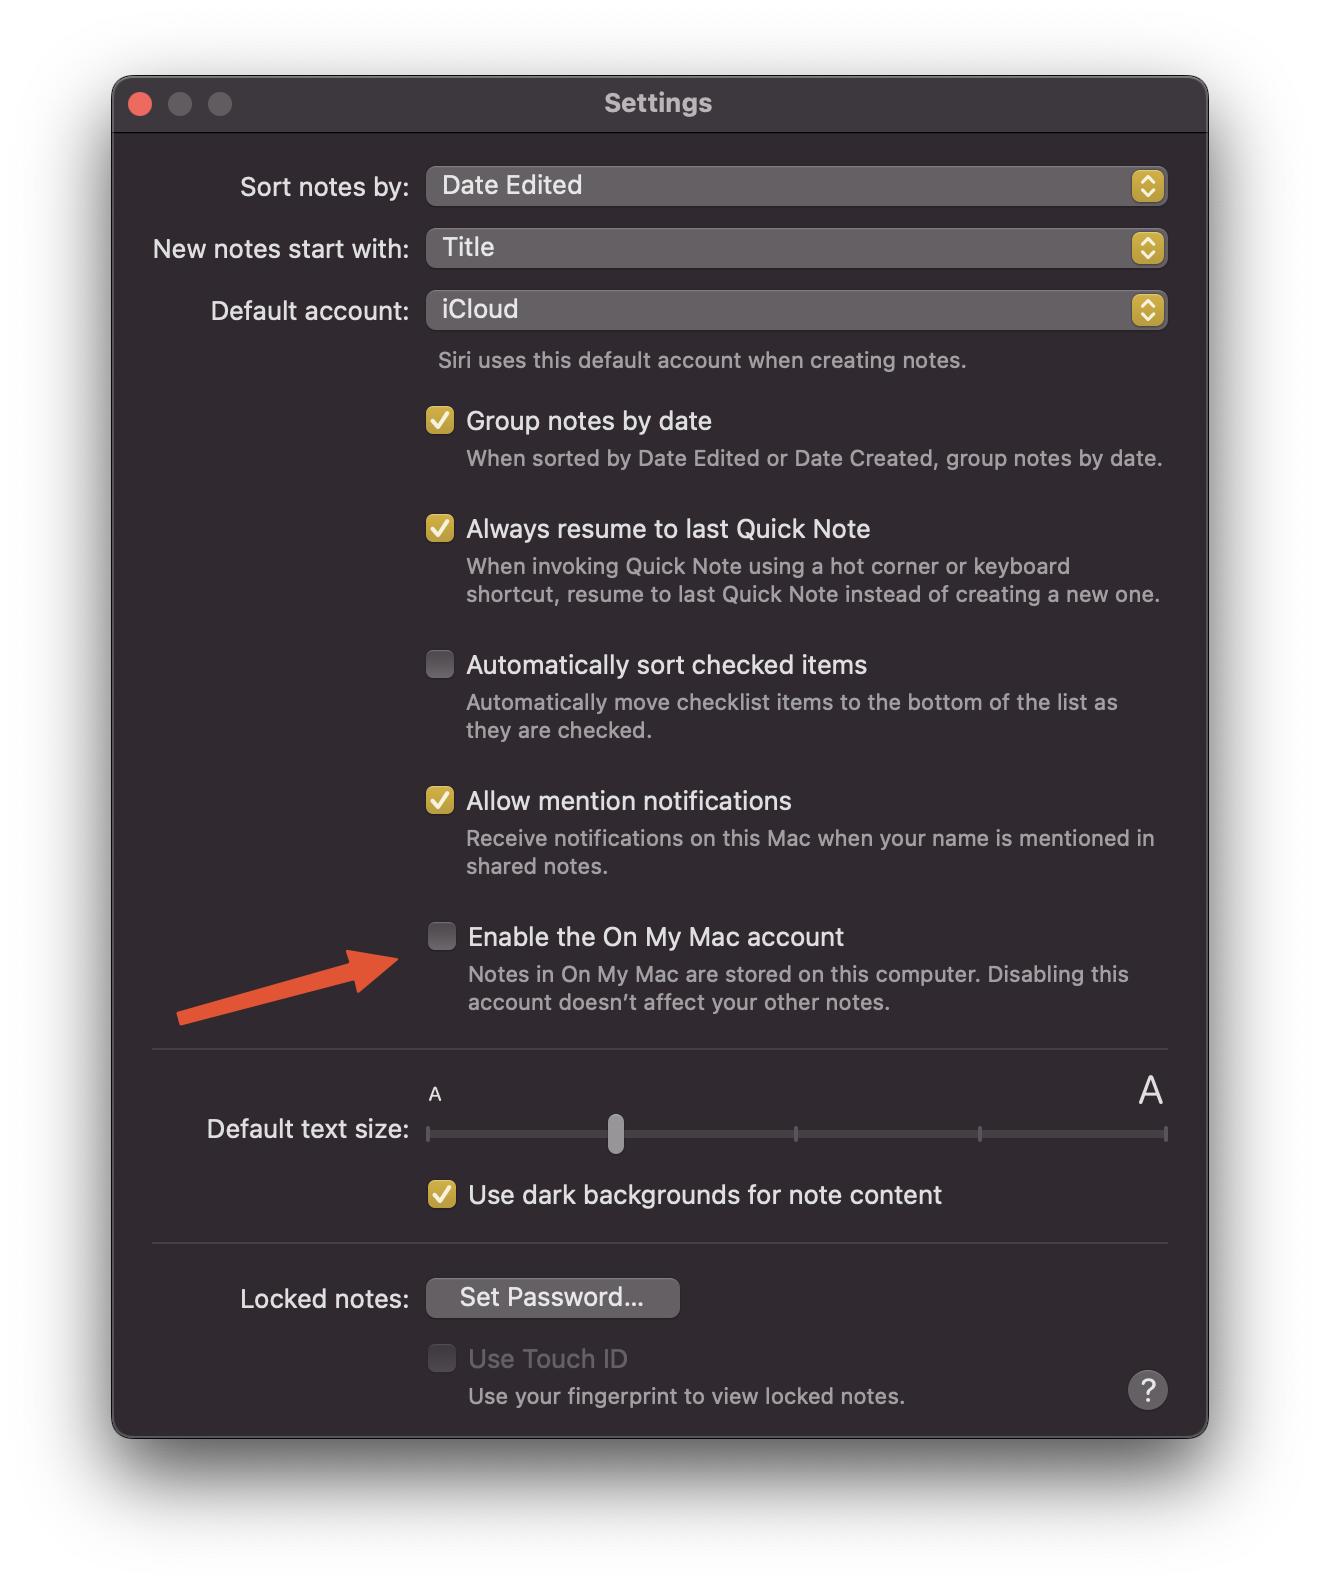
#Notes
To prevent saving notes which isn’t synced with iCloud, I do recommend to disable local notes.
We’ve done with basic system settings, so we can proceed to part 2 to set up our tooling.